Disable Action Needed prompt while connecting to WiFi
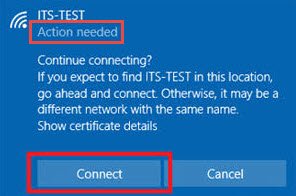
If there’s a corporate Wi-Fi setup at your workplace and its network has multiple endpoints, the chances are your computer may not connect to it automatically. Also, upon opening the list of wireless networks, you may notice ‘Action needed’ message underneath the SSID for the enterprise network. When you click on the network and hit ‘Connect’ – a web browser opens with a blank tab. Firstly, it is essential for us to understand that this behavior is not accidental but occurs by design. Windows uses something known as the Network Location Awareness (NLA) service to detect the properties of a network and determine how to manage connections to that network. This service, in turn, relies on a component named NCSI or Network Connectivity Status Indicator. It is NCSI that determines whether the computer has successfully connected to the network and whether the network has intranet or internet connectivity. Any changes in the network interfaces can trigger the ‘Action Needed’ prompt. To fix it, you’ll need to disable the NCSI active or passive probes used by NCSI component. You can disable the NCSI active or passive probes via
1] Disabling NCSI probe via Registry
For disabling NCSI Active probe via Registry, press Win+R in combination to open the Run dialog box. Type ‘regedi.exe’ in the empty field of the box and press ‘Enter’.
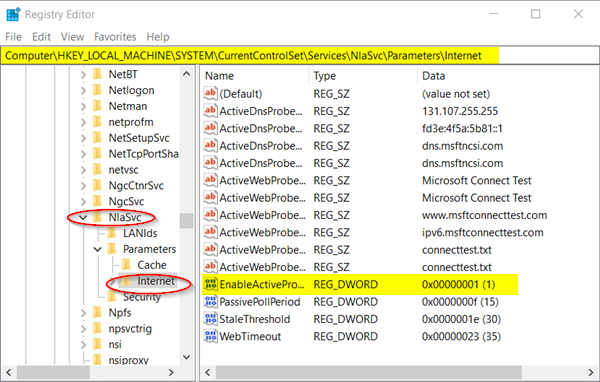
In the Registry window that opens, navigate to the following path address – Switch to the right-pane of the Internet registry key and look for the following entry – EnableActiveProbing registry DWORD (REG_DWORD).
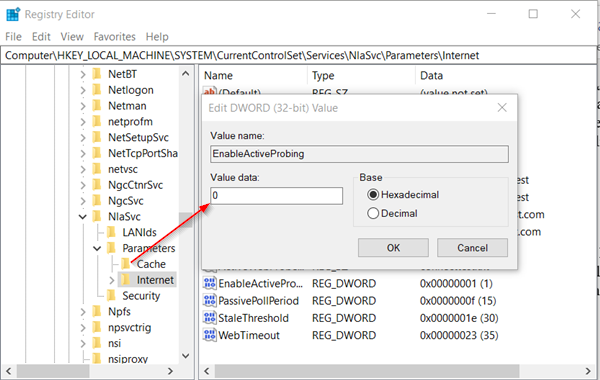
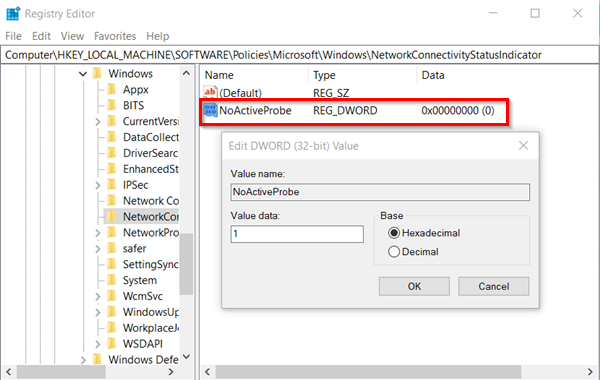
By default, the value for this entry is set to 1. Double click on it to modify its Value data and in the ‘Edit String’ box that appears, change its value to ‘0’. Hit the ‘OK’ button and exit the Registry Editor. Also, go to- Switch to the right pane and create a new DWORD (32-bit) Value ‘NoActiveProbe‘.
Now, double-click DWORD Value and change it from 0 to 1. Now, for disabling NCSI Passive probe via Registry, go to the following path address – There, right-click in the empty area and create a new DWORD (32-Bit) Value – DisablePassivePolling. Double-click on this key type and in the Edit String box that appears, change the value from 0 to 1. Decimal 1 (True) In the default Registry configuration, this registry entry does not exist. You must create it.
2] Disabling NCSI Probes via Group Policy Objects
For disabling NCSI Active probe via GPO, Open the ‘Run‘ dialog box, type ‘gpedit.msc‘ in its empty field and hit ‘Enter’. When the Group Policy Editor window opens, go to the following location, Expand ‘System‘ folder and choose ‘Internet Communication Management‘. Click on ‘Internet Communication Management‘ to make ‘Internet Communication settings‘ sub-folder visible. Click it and under ‘Setting‘ window on the right choose ‘Turn off Windows Network Connectivity Status Indicator active tests’ and check ‘Enabled’ circle. Similarly, to use Group Policy to disable NCSI passive probes, configure the following GPO: Expand the Network folder to make ‘Network Connectivity Status Indicator‘ sub-folder visible. Double-click ‘Specify passive polling‘ status and check the ‘Enabled’ circle. Close and exit GPO Editor. You should no more see the ‘Action needed’ message under your Wi-Fi network connection.


