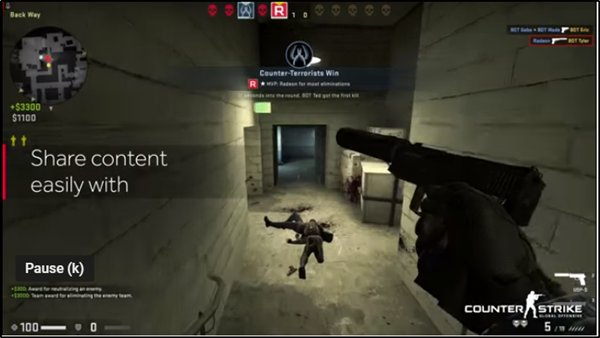
Radeon ReLive – Capture & stream gameplay
In this post we will cover the following topics: Let us now cover these points in a bit of detail.
1] Visit the AMD Drivers and Support page
The Support page provides 2 options to locate and download the latest version of the Radeon Software:
Automatically Detect and Install Your Driver – This option, when enabled runs the AMD Driver Autodetect Tool to detect your Radeon™ graphics productManually Select Your Driver – This option allows you to use AMD Product Selector to select your Radeon™ graphics product and available drivers.
After downloading the desired version, install the software and restart the system.
2] Access Radeon Settings
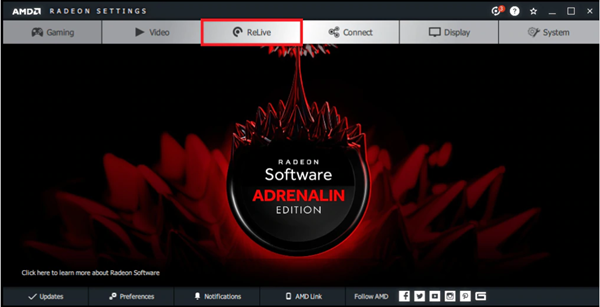
Once installed, open Radeon Settings by right clicking on your Desktop icon and select AMD Radeon Settings.
Then from the different tabs visible under Radeon Settings, select ‘ReLive’ as shown in the image above.
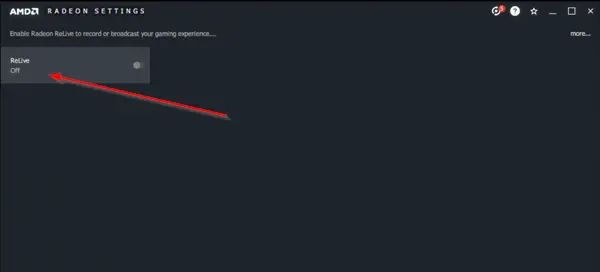
Thereafter, enable Radeon ReLive by setting the feature to ‘On’.
3] Configure Radeon Live Settings
It is important to configure the options available within the Radeon ReLive, Global tab to suit your preferences. So, access these options and configure them. These include,
Record DesktopSave FolderBorderless Region CaptureAudio Capture DeviceCustomizing HotkeysRecord MicrophoneAudio Volume Boost
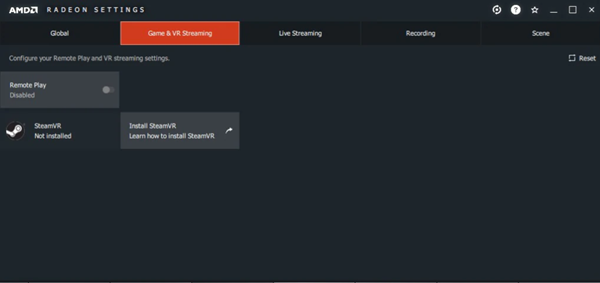
4] Set Game & VR Streaming Settings
Radeon Software Adrenalin 2019 Edition for Windows 10 64-bit is equipped with a feature known as Remote Play. It allows gaming enthusiasts to stream their PC-based content to supported mobile devices and HMDs (Head-Mounted Display) over WIFI network.
To make this feature work, select the Game & VR Streaming tab. Click on the Remote Play tile to toggle it from Disabled to Enabled.
5] Capture or recording game footage
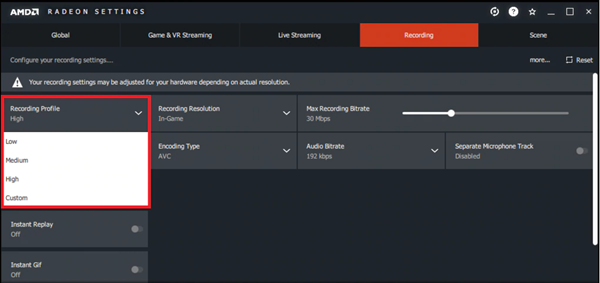
The Recording tab visible under Radeon settings allows customization of the visual as well as the sound quality of your gameplay footage.
For instance, there are predefined quality settings that control the level of quality and file size of your gameplay footage. These include,
LowMediumHighCustom
These profiles automatically adjust the recording resolution and recording bitrate depending on which profile you are using. Likewise, there’s Recording resolution option which allows customization of the output video resolution of a recording. In-Game automatically match the resolution used in your game with the Recording Resolution output video!
6] Configure Live Streaming settings
Having done this, it’s now time to configure Live Streaming settings to transmit your Gameplay via services such as YouTube, Mixer, Facebook, and others. Also, you can customize settings which influence the quality of your stream. It is important to mention here that Streaming requires Internet connection and bandwidth consumption. As such, gamers with limited Internet bandwidth should exercise caution and restrain from enabling streaming. Also, depending on your Internet service, the quality of streaming may change or prove unsatisfactory. You can modify Streaming Profile, Streaming Resolution, Streaming Bitrate, Streaming FPS and Audio Bitrate.
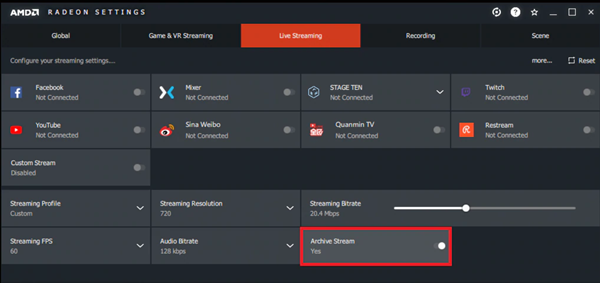
7] Enable Archive Stream
As the name suggests, the tab allows saving a video copy of the stream to a folder which can be later viewed or edited. By default, Archive Stream is set to Off.
Just slide the toggle to turn it to ‘On’ position.
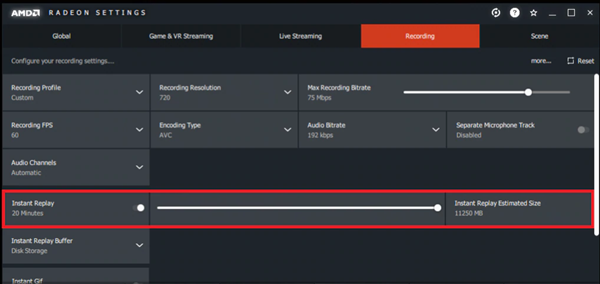
8] Enable Instant Replay
When enabled, Instant Replay will start to continuously record your gameplay and save the footage in your Save Folder.
It has a slider that can be adjusted in increments of 30 seconds, up to a maximum total of 20 minutes per session.
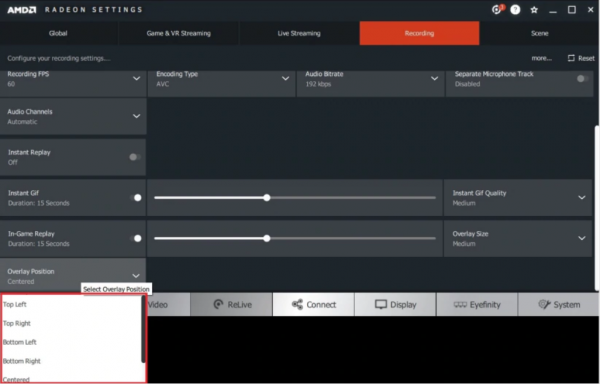
9] Move to Game Replay
Game Replay is accessible from the Recording tab. When there, drag the slider to increase the length, in seconds, of the In-Game Replay recording (values can range from 5 to 30 seconds). Thereafter, select the size of the Instant Replay overlay window. When done, click on the Overlay Position option and choose where you wish to have the In-Game Replay window positioned on the screen. You can choose any of the four corners of the screen.
In the end, begin playing the game and press the assigned hotkey to display the In-Game Replay overlay. This overlay will be shown on the existing screen, at the position specified by you. For knowing more about Radeon ReLive Requirements, Customizing Hotkeys, visit AMD Radeon Support Page.