PrivaZer Review
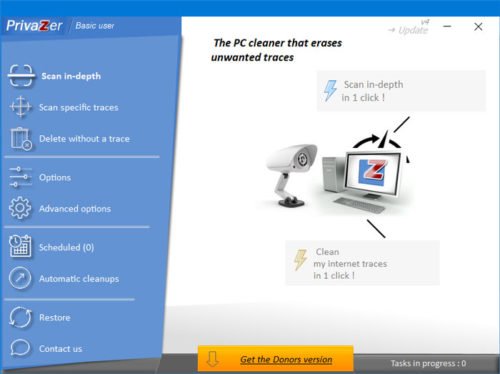
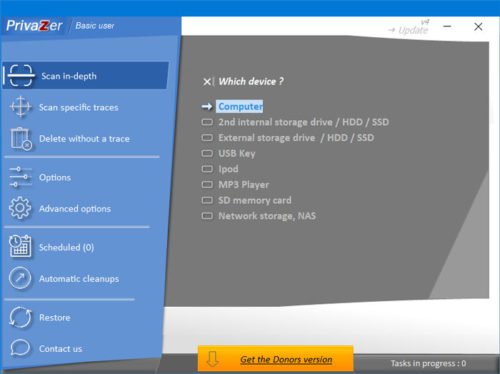
PrivaZer is junk file, temporary file, registry cleaner, a history remover, and a privacy cleaner, all packed in one. It will look for, in every nook and corner of your Windows computer, and clean out the junk and traces for you. Not only that, but it will also delete the junk, using 1 pass … or even 35 passes, should you be so paranoid about your computing and surfing habits. Some of the essential features and options of PrivaZer are here. In-depth scan: It can do an in-depth scan for various files (mostly junk files) so that users do not get significant lagging even after using a system for a long time. It can detect and scan for junk files in these locations –
Second hard drive. It can be an HDD or SSD.External storage (HDD or SSD).USB keyiPodMP3 playerSD cardNetwork storageNAS
Scan specific traces: Sometimes, you might want to remove all the internet activities, whereas sometimes, you might want to clean the Registry Editor as well. This tool can search for specific traces-
Internet activitiesResidual traces of old filesSoftware useIn RegistryUSB history
Delete without a trace: In case you have some confidential files, and you do not want them to be found by any file recovery software such as Pandora Recovery, etc., you can use this option. Schedule cleanup: You can schedule all the cleanups so that it does the job even when you forget to do it manually. Automatic cleanups: If you do not want to use the features mentioned above and you want to make things happen automatically, you can use these options. It is possible to clean everything up automatically. For obvious reasons, this functionality is minimal. For your information, you can have these two options-
Internet activityAt PC startup
There are more options included in PirvaZer. However, you need to use it to get them all. Different sections are equipped with different options, and they appear as per the requirements. PrivaZer can, with a single click, let you clean securely:
Traces in MFT, free space, USN Journal, $LogFileInternet browsingCookies, Super/ExercookiesSilverlight CookiesFlash cookiesRAMDatWebcacheMessengersWindows historyRegistryIndexingMemoryJump ListQuick AccessCopy, burningDownloadersOther softwareTemporary filesRecycle binSoftware use
You may not find all these options in one place as they appear as per the option you choose.
PrivaZer download, installation, and use
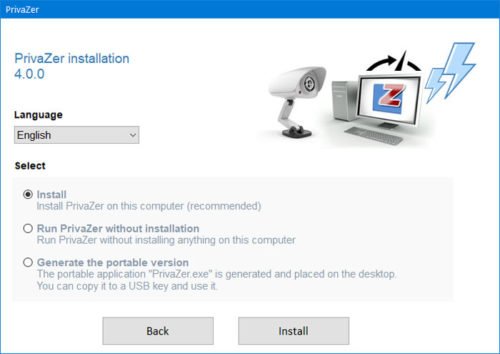
It is quite easy to install the PrivaZer on your PC. The best thing is that you can have a portable version of this tool so that you can utilize it for one time. However, if you are thinking of using it regularly, it is recommended to go through the installation process. After downloading and opening the .exe file from the official website, you can find a window like this-
It has three options –
InstallRun PrivaZer without installationGenerate the portable version
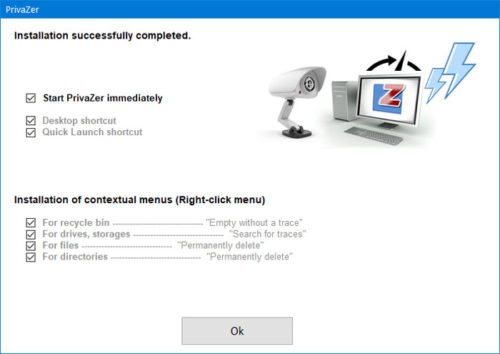
As you want to go through the installation process, you need to choose the very first option (Install) and click the Install button. After the installation, if you want to clean up something from the right-click context menu, you need to keep the ticks in the corresponding checkboxes in the next window during the installation process.
After doing everything successfully, you can find a window like this-
At first, you should visit the Advanced options page so that you can set things up as per your desire. The most important thing is the Cleanup and Memory, Indexing tabs. In the Cleanup tab, you should make a tick in the Always create a restore point checkbox so that you do not face any problem in the future. Secondly, you need to visit the Memory, Indexing tab where you can find these options- Delete pagefile.sys
After each cleanup with PrivaZerAt next PC shutdown onlyAt each PC shutdown
Hibernation
Allow computer hibernation
Wsearch Indexing
Start or stopChange Startup type
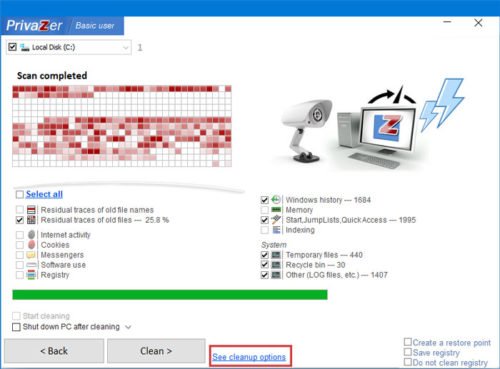
Now, let’s assume that you want to scan the system drive (C drive) for junk files. For that, go to the Scan in-depth tab, and select the Computer option.
After that, make sure that the Local Disk (C:) is selected. Next, you need to choose the parameters or what you want to search for. Then, click the Scan button. Now, it will go through all the parameters that you selected to complete the entire task. It may take some time, but the time depends on the number of options you choose earlier.
Once the scan is completed, you will be asked what you want to do next – i.e., how you would like the clean up to be done. As we mentioned earlier, PrivaZer does not just delete the files; it performs US Dept of Defense grade file wiping that makes deleted data unrecoverable. Click the See cleanup options.
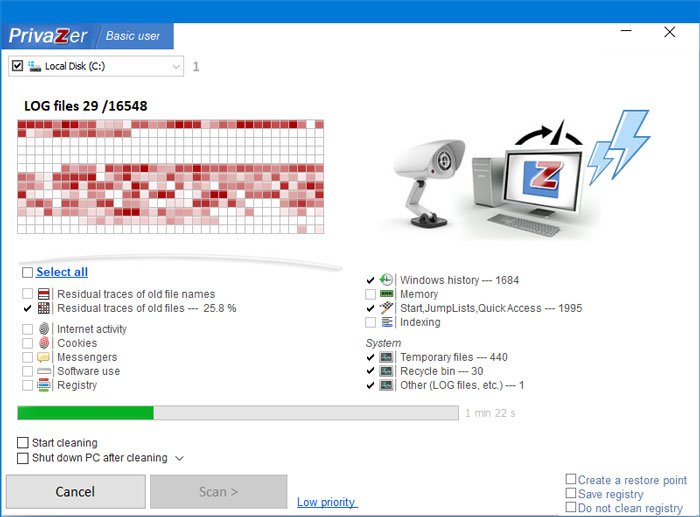
From here, choose 1PASS – All zero Pass option and click the OK button.
Now, click the Clean button to make it happen. For your information, here we have shown the process to clear junk files from the C drive only. You can perform the same steps with a different selection of disk to delete the same from another drive. I have tried PrivaZer on my Windows 10, 64-bit laptop, and it worked just fine. Re-booted – no issues faced! If you like, you can download PrivaZer from the official website. But as I have always been mentioning – it is always a good idea to create a system restore point first before making any changes so that you can revert back, should you not like the changes.