If multiple computers are connected to a network, you can quickly create a shared folder and start sharing or transferring files on the go. However, if you do not want to index those shared folders in the Search Index on your Windows 10 computer, you can disable it using this guide.
Prevent Windows from automatically adding Shared Folders to Search Index
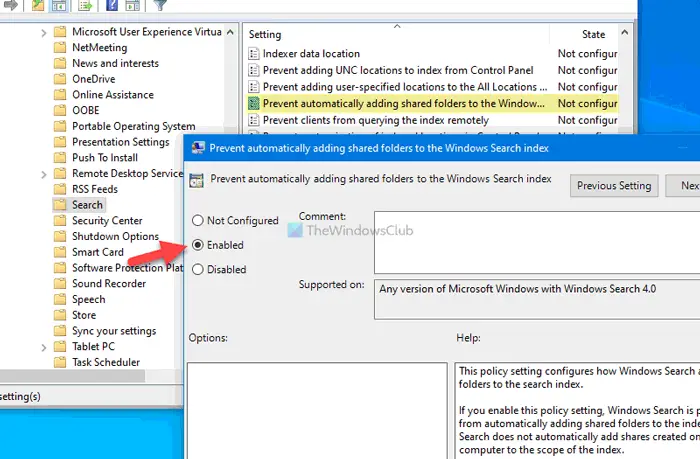
To prevent Windows 10 from automatically adding shared folders to Search Index using Group Policy Editor, follow these steps: Let’s check out these steps in detail. At first, press Win+R, type gpedit.msc, and press the Enter button to open the Local Group Policy Editor on your computer. Once it is on your screen, navigate to the following path: Here you can find a setting called Prevent atomically adding shared folders to the Windows Search index on your right side. Double-click on this setting and choose the Enabled option.
At last, click the OK button to save the change.
Prevent Windows from automatically indexing shared folders
To stop Windows 10 from automatically adding shared folders to Search Index using Registry Editor, follow these steps: Read on to know more about these steps. At first, press Win+R to open the Run dialog, type regedit, press the Enter button and click on the Yes option in the UAC prompt to open Registry Editor. Next, navigate to the following path: Right-click on Windows > New > Key and set the name as Windows Search.
Right-click on Windows Search, select New > DWORD (32-bit) Value and set the name as AutoIndexSharedFolders.
Then, double-click on the REG_DWORD value, enter 1 as the Value data, and click the OK button to save the change.
That’s all! This is how you can prevent Windows from automatically indexing shared folders. Read: How to stop Windows Search Indexing when Disk Space is Low.