Pin to Start not working or missing in Windows 11/10
If Pin to Start is not working or is missing on your Windows 11/10 computer, then use GPEDIT or REGEDIT to fix the issue. You may also re-register the Shell32.dll file and see if that helps. Before you begin, you may want to create a system restore point and/or backup your Registry first.
Using Group Policy Editor
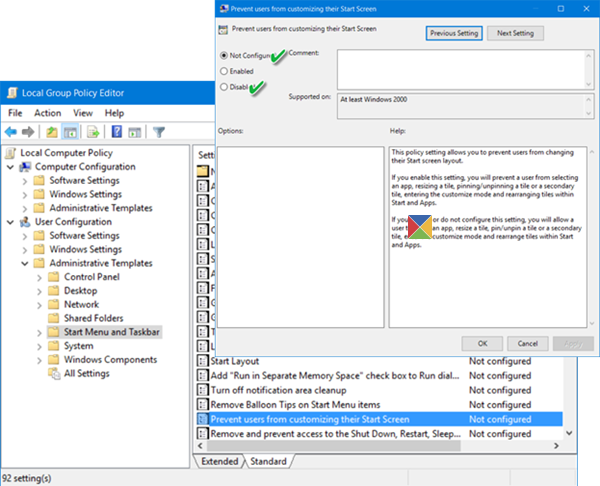
Type gpedit.msc in the taskbar search and click open the Group Policy Editor.
Now navigate to the following setting: In the right pane, double-click on Prevent users from customizing their Start screen to open its Properties. Change the configuration to Not configured or Disabled. While here, you may also want to ensure that the Start Layout policy is also set to Not configured or Disabled.
Using Registry
If your Windows 11/10 does not have the Group Policy Editor, Run regedit to open the Windows Registry. Next, navigate to the following registry key: In the right pane, see if NoChangeStartMenu exists. If it does, right-click on it and select Delete. Or you may give it a value of 0.
Now navigate to the following key: Look for and delete the LockedStartLayout DWORD, if it exists. Or you may give it a value of 0. Restart your computer and see if the Pin to Start context menu option works for you.
Re-register Shell32.dll
If one of the above options does not help you, you might want to re-register the Shell32.dll file, by running the following command in an elevated command prompt window: Here regsvr32 is a command-line utility used for registering and un-registering OLE controls like DLLs and ActiveX controls in the Windows Registry, Shell32.dll is the file that handles shell API calls and the /i parameter calls the DLLInstall function. Hope something helps you.

