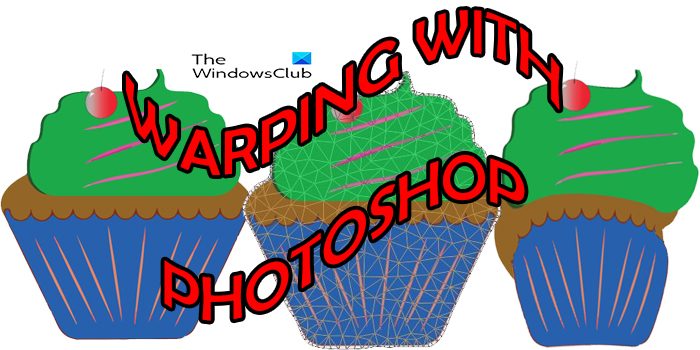
How to use Photoshop Warp Tool
Using the warp tool in artwork can add a new dimension to your work. Warp can be used for creating labels for packages that are not flat. Warp is good for creating labels for cylindrical objects like bottles, cans, jars, and many others. Lets us see how to bend or warp images, shapes and paths in Photoshop using the Photoshop Warp Tool. The steps involved are:
How to Warp Images, Shapes, and Paths in Photoshop
1] Transform Warp
Select the layer or an area in the image that you want to warp, go to Edit then Transform then Warp. When the layer or area in the image has been selected, you can either go to Edit then Transform then Warp or press Ctrl + T and then click the Switch Between Free Transform And Warp Modes button in the options bar.
To see additional Visual Guide options, click the gear icon in the Options bar. You can now set the warp guide display option and choose when to show the visual guides – Auto Show Guides, Always Show Guides, and Never Show Guides. By default, the Grid is set to Always Show Guides. You also can change the Color and Opacity of the visual guides and the number of lines that make up the guide. The Density option sets how many lines appear between each Split Warp line. By default, Density is set to 2. You can choose View > Extras to show or hide the warp mesh and control points when using the control points to distort an item. To warp your selection using a warp preset, choose a warp style from the Warp pop-up menu in the options bar. To create a custom warp mesh, choose a grid size from the Grid pop-up menu in the options bar.
Select a grid size – Default (1×1), 3×3, 4×4, or 5×5.Select Custom and then specify the numbers of Columns and Rows in the Custom Grid Size dialog.
To add more control grid lines to the warp mesh, choose an option to split the warp. In the options bar, click any of the Split buttons or Choose Edit > Transform > Split Warp Horizontally, Split Warp Vertically, or Split Warp Crosswise. Move the pointer within the mesh area and click where you place additional control grid lines. As you move the pointer, over the warp mesh, you’ll see the split lines track the pointer. When you click, additional control points are added to the warp mesh.
To manipulate the shape, drag the control points, a segment of the bounding box or mesh, or an area within the mesh. When adjusting a curve, use the control point handles. This is similar to adjusting the handles in the curved segment of a vector graphic.Click on a grid line to activate control points for editing the warp. Click on an anchor point (at the intersection of the grid lines) lets you edit the control points surrounding that anchor. Drag the control points to warp the image.To select multiple points, Shift + click on the anchor points or click-and-drag the pointer over the points while holding down the Shift key. A rectangle appears around the selected points if two or more points are selected.To deselect multiple points, Shift + click on the active anchor points or click-and-drag the pointer over the active points while holding down the Shift key. The rectangle surrounding the selected points automatically resizes as points are selected or deselected.To delete a selected grid line (control points along the line are visible), press Delete or choose Edit > Transform > Remove Warp Split.To delete both the horizontal and vertical grid lines passing through an anchor point, click the anchor point, then press Delete or choose Edit > Transform > Remove Warp Split.To change the orientation of a warp style that you chose from the Warp menu, click the Change The Warp Orientation button in the options bar.To change the reference point, click a square on the Reference point locator in the options bar.To specify the amount of warp using numeric values, enter the values in the Bend (set bend), X (set horizontal distortion), and Y (set vertical distortion) text boxes in the options bar. You can’t enter numeric values if you have chosen None or Custom from the Warp Style pop-up menu.
A custom Split Warp has been applied around the neck of the bottle. The Density for the visual Guides has been set to 4; there are four guidelines between each Split Warp. To finish the warping process, you can do one of the following:
Press Enter, or click the Commit button in the options bar.To cancel the transformation, press Esc or click the Cancel button in the options bar.
2] Transform Warp – Cylinder
This is a great tool for those who design packages. This tool is great for making packages and labels that are cylindrical. The Cylindrical transform warp allows for the curving of flat artwork to a rounded cylindrical surface. There are added bottom/left and top/right resizing controls so that the entire selection can be freely transformed.
Here are the steps to using the Cylindrical Transform Warp:
Select a layer or region in the image you want to warp.Choose Edit then Transform then Warp from the menus or press Control + T.Click the Free Transform / Warp Modes button in the options bar.Go to the Warp dropdown menu in the options bar and select the bottom icon: Cylinder.Click & drag the on-screen controls to shape-adjust the warp.
You can use the bottom/left and top/right resizing controls so that the entire selection can be freely transformed. Also, you can apply the cylindrical transform warp to Text layers as well.
A. Adjusts curvature at both the top and bottomB. Sets the top-right cornerC. Adjusts perspective. Slide to the center to appear further away, slide to the right to appear very closeD. Adjusts bottom curvature, independent of the topE. Sets the lower-left corner
4] Split Warp
In older versions of Photoshop, whenever you wanted to warp part of an image, it would end up affecting the whole image. Now Photoshop has made it possible to warp part of an image while leaving the rest of the image intact. This is essentially Split Warp, the ability to split parts of an image to warp. You can split warp crosswise, vertically, and horizontally. Use the Control key to quickly toggle through the split warp options without returning to the menu bar.
Hold down the Control key and click anywhere the warp mesh to split the warp crosswise at that location.Hold down the Control key and move the pointer near the edge of an existing horizontal grid line. Click to split the warp vertically at that location.Similarly, hold down the Control key and move the pointer near the edge of an existing vertical grid line. Click to split the warp horizontally at that location.
5] Puppet Warp
Puppet Warp provides a visual mesh that lets you drastically distort specific image areas while leaving other areas intact. Applications range from subtle image retouching (such as shaping hair) to total transformations (such as repositioning arms or legs). In addition to image layers, you can apply Puppet Warp to layer and vector masks. To non-destructively distort images, use Smart Objects.
This is the original image before the Puppet Warp is applied.
In the Layers panel, select the layer or mask you want to transform, choose Edit then Puppet Warp. In the options bar, adjust the following mesh settings:
Mode – Determines the overall elasticity of the mesh.Density – Determines the spacing of mesh points. More Points increase precision but require more processing time; Fewer Points do the opposite.Expansion – Expands or contracts the outer edge of the mesh.Show Mesh – Deselect to show only adjustment pins, providing a clearer preview of your transformations.
In the image window, click to add pins to areas you want to transform and areas you want to anchor in place. To rotate the mesh around a pin, select it, and then do either of the following: To rotate the mesh a fixed number of degrees, press Alt and position the cursor near to, but not over the pins. When a circle appears, drag to rotate the mesh visually. Note: The degree of rotation appears in the options bar. To rotate the mesh automatically based on the selected Mode option, choose Auto from the Rotate menu in the options bar.
When your transformation is complete, press Enter to confirm. Read: Photoshop Tips and Tricks for Beginners
What is Split Warp and Why is it Important?
Split Warp makes it possible to warp part of an image while leaving the rest of the image intact. Split Warp is essentially the ability to split parts of an image to warp. You can split warp crosswise, vertically, and horizontally. Split Warp is important because it allows you to make changes to one part of an image while leaving the rest of the image intact.
What is Transform Warp – Cylinder?
Transform Warp – Cylinder is a warping method that allows an image or text to be warped around a cylindrical object. This warp method is very important to persons who design labels or packages as it allows for placing labels and words around cylindrical objects.
What is a Path in Photoshop?
A path is a boundary around an object or text in Photoshop. The path is like the edge of the outline of the image or text. Paths are important because they can be used to write text around images or other texts. You can see the path around an image or text by using the magic wand to select the image or text and you will see the outline. You can also select the path by clicking the text or image and going to the Layers panel and clicking the Path tab.