How to view the DNS cache contents in Windows
The DNS cache contains a list of remote server names and the IP addresses (if any) they correspond to. Entries in this cache come from DNS lookups that happen when attempting to visit Web sites, named FTP servers, and other remote hosts. Windows uses this cache to improve the performance of Web-based applications.
Using Command Prompt
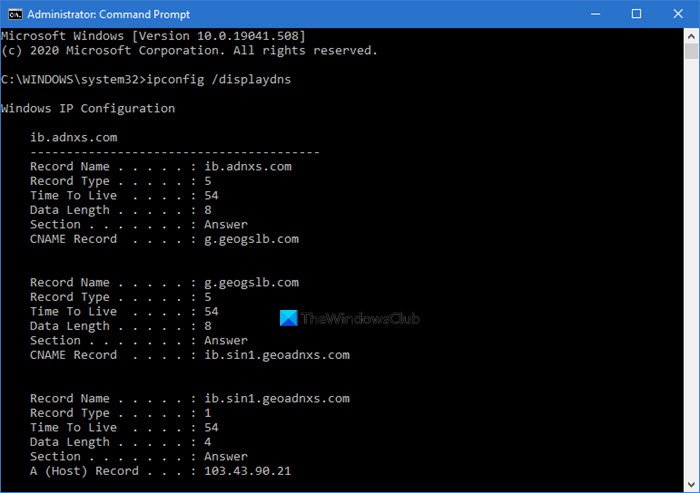
To view the DNC cache contents, execute the following command in an elevated CMD: The results will be displayed.
Record name is the name you query DNS for, and the records belong to that name.Record type is the type, displayed as a number or name. In the DNS protocol, each has a number.Time To Live is the time in seconds after which the cache entry must expire.Data Length is the length in bytes, eg- An IPv4 address is 4 bytes; IPv6 is 16 bytes.Section of a DNS reply is the actual answer to the query,Additional contains information that will likely be needed to find the actual answer.CNAME is the canonical name.
If you wish to export the results, you can use the command ipconfig /displaydns > dnscachecontents.txt to save the output in the text document dnscachecontents.txt.
Using PowerShell
If you wish to get you the same information as a collection of DNS record objects which can easily be exported or saved in a database, run the following cmdlet in PowerShell: This command will list the Help information: You can also use the following command to get better formatting:
How to clear the DNS cache
You can use the command to flush DNS Cache in the command prompt: Our freeware FixWin for Windows, let you flush the DNS cache, etc., in a click.
Turn Off or Turn On DNS Cache
To turn off DNS caching for a particular session, type net stop dnscache and hit Enter. To turn on DNS caching, type net start dnscache and hit Enter. Of course, when you restart the computer, the DNC caching will, in any case, be turned on.
Disable DNS Cache
If for some reason you wish to disable DNS caching, type services in Start search and hit Enter to open the Services Manager. Here locate the DNS Client service. Double-click on it to open its Properties box. Here change its startup type from Manual to Disabled. If you disable the DNS Client service, DNS Lookups may take longer. These resources may also interest you: