Repair Print Spooler in Windows 11/10
Earlier, there was a Microsoft Fix It tool for repairing Print Spooler, but that tool was discontinued. Therefore, you can try some manual fixes covered in this post to repair it.
1] Enable or turn on Print Spooler
If the Print Spooler service is not running at all, then it might be possible that the service is disabled or turned off, or stopped. So, first, you need to turn on or enable Print Spooler service using Windows Services Manager or some other ways. Once the service is started successfully, you might be able to use it without any issue.
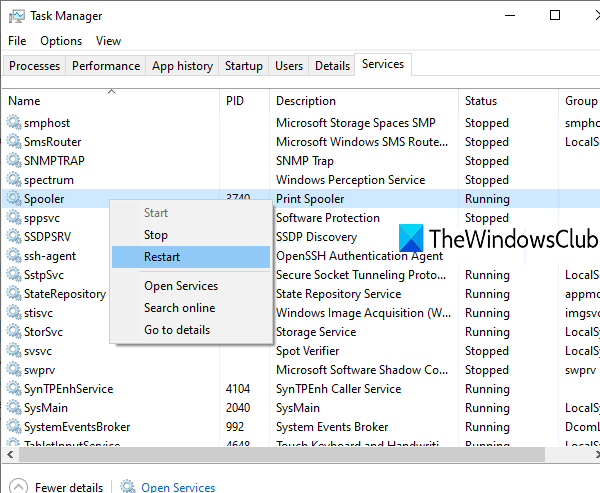
2] Restart Print Spooler service using Task Manager
If this service is already running and still you are facing some kind of issue, then a simple restart for this service might help you fix the issue you’re facing. You can restart Print Spooler using Task Manager. The steps are as follows:
3] Reset and Clear Print Spooler using Command Prompt
If there is some print job(s) stuck in the print queue, then also it is the possibility that Print Spooler is not working as it should. So, it is good to reset and clear Print Spooler. This can be done using Command Prompt. Here are the steps: Open Command Prompt as administrator Execute the following command: This will stop the Print Spooler service which is handy so that the reset process can take place successfully Next, Run the following command: This will begin and complete the reset process and remove stuck jobs (*.shd and *.spl files) Finally, execute this command. This will start the Print Spooler again. This should solve your problem. You can also delete SHD and SPL files manually. For this, access the PRINTERS folder. Its path is here: Look for those files and delete them manually.
4] Add required binary files for Print Spooler
The required DLL and EXE files for Print Spooler must be present to make it work properly. These files are spoolss.dll, win32spl.dll, spoolss.exe, and localspl.dll. All these files are present in the System32 folder (C > Windows > System32). Check if all such files are there or not. If not, you need to fix the missing DLL files and EXE files for Print Spooler. After that, Print Spooler should work fine.
5] Make sure Print Spooler dependencies are running
There are many services that depend on other services or system components to work properly. The same goes for Print Spooler also. So, you need to find all such dependencies and run or start them if not already. To do this, you can open Windows Service Manager, and then find the Dependencies for Print Spooler by accessing its properties window. After that, run all such dependency services using the same Windows Service Manager.
6] Using Registry Editor
This option might is a bit complicated. Registry Editor stores the important entries (keys and values) for system files and other applications. There are Print Spooler Registry entries also present that have to be there to make it work correctly. If those files are not present, it can cause issues that Print Spooler is not responding properly. So, check such entries and create Registry keys and values if such entries don’t exist. Before trying any of the below-mentioned options, take a backup of Registry so that you can restore it later if needed.
1] Add standard print monitor keys and their values
Carefully follow all the steps:
Launch or open Registry Editor of Windows 10Access Monitors registry key. The path is:
Create Local Port, Standard TCP/IP Port, and USB Monitor registry keys under Monitors keyCreate Driver name String Value in all the above-mentioned registry keysDouble-click on Driver value for Local Port keyAdd localspl.dll in the Value data boxPress OKDouble-click on Drive String value for Standard TCP/IP Port keyAdd tcpmon.dll in Value data boxPress OKDouble-click on Driver value for USB Monitor keyAdd usbmon.dll in Value data boxPress OK.
2] Add winprint Registry key and its String Value
Open Windows 10 Registry EditorAccess Print Processors key. The path is:
Create a winprint Registry key under the Print Processors keyCreate Driver name String Value on the right-hand sideDouble-click on Drive String ValueAdd winprint.dll entry in the Value data fieldPress OK.
3] Delete any fake path for SpoolDirectory String Value of your printer
This option might help if you have connected multiple printers with your computer. Some infectious files or malware might have added some fake path in the Value data field of SpoolDirectory String Value of your printer present in the Registry Editor. That might be causing an obstacle in using Print Spooler perfectly. So, deleting that fake path might help. The steps are:
Open Registry EditorAccess Printers Here is the path:
Under Printers, click on the Printer name that is causing the problemOn the right-hand side, scroll down and double-click on the SpoolDirectory String valueClear or remove all the entries present in the Value data fieldPress the OK button.
Hope something from these fixes helps you. If it does not, you may need to consider Reset This PC option.
Print Spooler Repair tool
There used to be a Fix-It as well as a Print Spooler Cleanup Diagnostic Tool from Microsoft but that is now not available. The Printer Troubleshooter is the closest you have. You may try this free 3rd-party tool called Fix Print Spooler from sordum.org and see if that helps you.
Print Spooler Service missing?
If Print Spooler Service is missing you will have to Reset and Clear Print Spooler using Command Prompt, Add required binary files for Print Spooler and Make sure Print Spooler dependencies are running as explained above in this post.