YouTube video editor features and options
Although it doesn’t allow you to add effects, transitions, etc., it has some features. YouTube wants to help new content creators, who do not have much money to opt for professional video editing software such as Adobe Premiere Pro or Final Cut Pro, etc. The available features are:
Trim video: It is possible to trim any video with the help of this video editing panel. It has a one-click option so that you can trim the video quickly.Add audio: YouTube offers a list of royal-free sounds so that you can choose something from there. Although there are so many websites from where you can download royalty-free music, it is possible to use YouTube’s list as well.Choose the end screen: To increase the engagement, you can edit the end screen of your video. It is possible to show some other videos, “subscribe-to-channel” options, etc.Blur video: Sometimes, you might need to blur some private data visible in the video. If so, you can use the in-built option of YouTube’s video editor to add the blur effect. It is possible to implement blur to the whole screen as well as a small portion of the video.
If you are okay with these four features, you can go through the following steps to know the exact process of editing videos. The best thing about this tool is that you can edit existing or already published videos as well.
How to use YouTube video editor
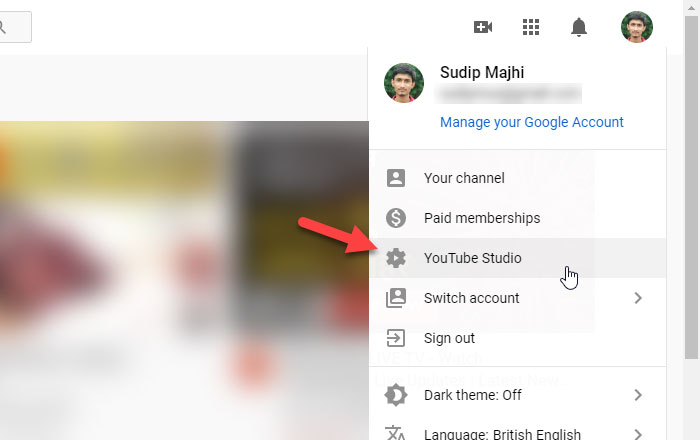
To open & use the video editor in YouTube, follow these steps- First, open your channel on YouTube. For that, visit the official website of YouTube – www.youtube.com and click the SIGN IN button. Then, you need to enter the login credentials of your Gmail account. This account should match with your YouTube channel’s user ID. After signing into your account, click on your profile picture and select YouTube Studio from the list.
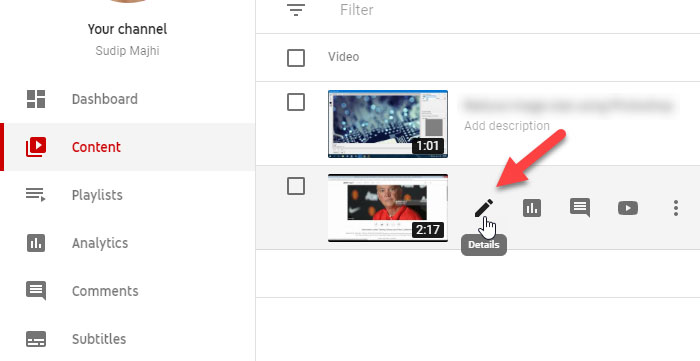
It should show the Dashboard on your screen. You need to click the Content option, which should be visible on the left-hand side. After clicking it, all the uploaded videos should appear. Now, you can choose one and click the corresponding Details button.
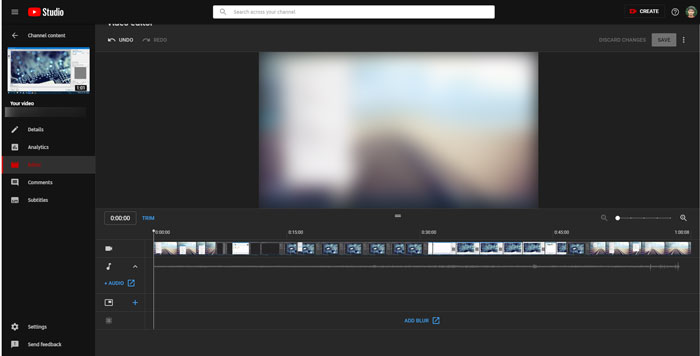
Then, it should show all the information related to the video. However, you need to switch to the Editor tab, where you can find all the options.
These above-mentioned steps are helpful when you already uploaded and published the video. However, if you want to create a new video, you need to use the Upload videos option that appears after clicking the CREATE button. Either way, the editing panel looks something like this-
From here, you can make all the edits, as mentioned above. Some features such as AUDIO ADD BLUR, etc. work externally. In other words, you need to leave the actual editing panel to make use of those options. After making all changes as per your requirement, you can click the Save button to store everything. Then, you can edit the details and publish the video as usual. I hope this guide helps you to edit your first video without any problem.