How to move installed Apps to another Drive in Windows 11/10
There was a not-so-easy way to change the default installation location for apps, but it worked for some and not for others. Windows 11/10 has made it easy to get things done. The new Settings window has all the options to move the Windows 11/10 apps to any other drive.
Windows 11
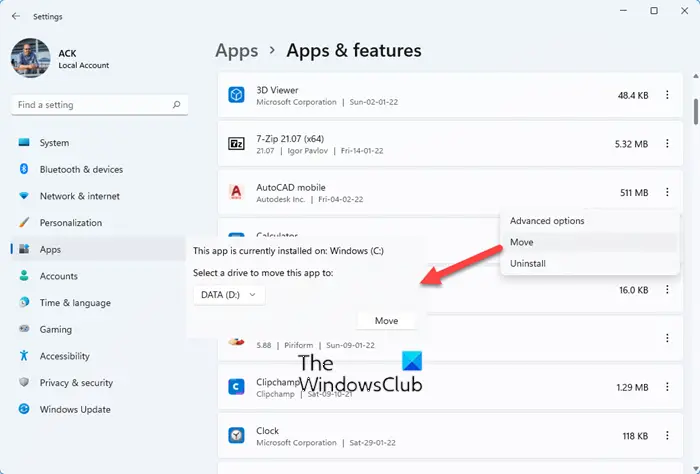
To move the installed Microsoft Store app to another drive in Windows 11, do the following: Please note that this option is not available for all apps.
Windows 10
Press Win + I to open the Settings panel. Then, click on the System button.
Next, go to Apps & Features section and wait for Windows to determine the app size. Now, find the app that you want to move to another drive. Then, click on the app and select Move.
Next, select a drive and click on Move.
It will take a few moments to complete since this depends on the app size. Once the process is completed, the Windows Store app will be moved to a new location. If you are facing low disk-space issues after upgrading, you can use this technique to move apps from the default system drive to another drive, and even direct new installs to another location. UPDATE: Move installed apps setting appears to be grayed out for many, including me. Caleb adds in comments that Microsoft has decided to postpone offering this setting for the moment. Related reads:
Move installed Programs using Application MoverHow to move Games & Programs using FolderMoveHow to Move Steam Games to another Drive.
PS: Also, see how you can change the default Program Files installation directory location or Pick a Drive for installation in Microsoft Store before downloading the app.

