There are two IoT versions of Windows 10 for the Internet of Things from Microsoft. To know about them, read about Microsoft Windows 10 IoT Core vs Windows 10 IoT Enterprise. IoT Core is good for the single board, single app machines. If you have to install Windows 10 on Raspberry Pi, it would be IoT Core as it takes less space without compromising on quality. Let us see what you need to install Windows 10 IoT Core to Raspberry Pi 3.
Getting ready to install Windows 10 IoT Core to Raspberry Pi
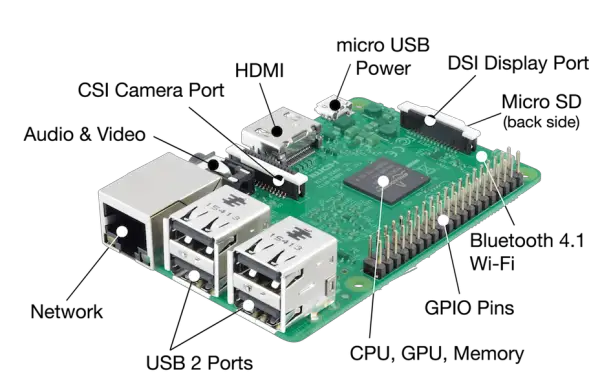
You already have the motherboard/computer-board in the form of the Raspberry Pi. You will need: That’s the hardware part. You will need a copy of Windows 10 IoT Core Dashboard. You can download it from the Microsoft website. You will get Setup.exe that you have to run to download the remaining components from the Internet. It takes a minute or two, depending on your computer and internet speed. Towards the end of setup, you will get the Windows 10 IoT Core Dashboard. The first screen is the Set up a New Device screen, as shown below.
How to install Windows 10 IoT Core on Raspberry Pi
As soon as you power up the Raspberry board, it boots and installs Windows IoT Core on itself. Now it is time to install your app to the Raspberry board. You can use your app or use one from the samples available in the Dashboard. Each sample is interconnected to an online help page telling you how to use it. That’s it. That’s how you install Windows 10 IoT Core to Raspberry Pi 3. If you still have questions, please comment below. Read next: Windows 10 IoT Core vs Raspbian – Which is better?