Can I install ESXi on a virtual machine?
PC users looking to install ESXi on a virtual machine on a Windows 11/10 computer will need the following: a physical CPU with native virtualization support (Intel VT or AMD-V), the VM needs at least 1.5 GB of memory, two VCPUs and enough disk space for the server itself and for the VMs you will run inside it. These specifications are prerequisite in order to run ESX or ESXi in VM for a seamless experience.
Install VMWare ESXi in a Hyper-V Virtual Machine
You can install and run an ESXi inside a Hyper-V Virtual Machine, but you should note that it can be useful only in a testing environment because it is really not supported in production. The only prerequisites for this operation is, that you must have a Hyper-V Host running Windows Server or Windows 11/10 with an Intel processor with VT-x and EPT technology. Basically, to install ESXi in a Hyper-V Virtual Machine requires a 5-step approach, which we will discuss in separate subheadings as follows:
1] Download and install VMware PowerCLI
VMware published VMware PowerCLI on the PowerShell Gallery. So, to download and install the VMware PowerCLI on the Windows host machine, do the following:
Press Windows key + X to open Power User Menu.Tap A on the keyboard to launch PowerShell in admin/elevated mode.In the PowerShell console, type in or copy and paste the command below and hit Enter:
Wait a moment until the installation finishes. Once the installation is done, you can proceed with Step 2] which is to run the customizer script.
2] Download and run ESXi-Customizer
The ESXi-Customizer is a PowerShell script that will simplify and automate the process of creating fully patched and customized ESXi installation ISOs using the VMware PowerCLI ImageBuilder module. You can download the ESXi-Customizer PowerShell script, unzip the archive package, and then right-click the Powershell script and select Run with Powershell from the context menu to run the script on the Windows host machine. The script will download the ESXi 6.0 ISO from the VMware online depot and you can customize the ISO by injecting drivers. Below are the parameters and respective descriptions for the customization:
Use the –v60 parameter for ESXi 6.0 but you can use the -v65 parameter for ESXi 6.5. Use the –vft parameter to connect to the V-Front Online Depot.Use net-tulip in order to load DECchip 21140 Ethernet driver inside the ISO. This driver allows running ESXi as a VM under Microsoft Hyper-V.
Once the ISO is downloaded, you can proceed with the next step below.
3] Create Hyper-V ESXi VM with Legacy Network Adapter
To create Hyper-V VM with a Legacy Network Adapter on the host machine, you can follow the instructions in our guide on how to Configure & Use Hyper-V and Create Virtual Machines in Windows. During the VM creation, select Generation 1 for your VM in order to make it possible to use a legacy network adapter with the compatible drivers that you have integrated into the ESXi installation image in Step 2] above. Also, assign at least 4 GB of memory. And keep in mind that using Dynamic Memory for the VM is not recommended. After you have successfully created the ESXi VM, before starting this Virtual Machine, you need to modify the number of virtual processors – you can configure 2 processors for the VM. Then remove the default network adapter, and add a Legacy Network Adapter and connect to your Hyper-V Virtual Switch in order to communicate with the internet or with your LAN. Also, configure the adapter with Mac Spoofing enabled. Once done, proceed with the next step below.
4] Download and run the Enable-NestedVM.ps1 script
Nested Virtualization simply means that you can run a VM inside a Virtual Machine. At this step, you can simply download the Enable-NestedVM PowerShell script and then run the script as in Step 1] above. Once done, you can proceed with the final step below.
5] Starting and configuring the ESXi Virtual Machine
Now you are ready to install ESXi on a Hyper-V VM. Do the following:
Start your VM by right-clicking the VM name, select Connect and click the Start button.Press TAB when you see the boot screen with a blue background.
Pressing TAB key on your keyboard allows you to modify boot options, and prevent hanging the VM during boot.
Now, type the command below and hit Enter:
The VMware ESXi installer will now load, and you can see the loaded modules including the tulip module that is integrated to your installation image.
Press Enter on the welcome screen to continue when the installer has been loaded.Next, press F11 to accept the license agreement and continue.Select a disk to install ESXi on.Tap Enter to continue.Next enter a root password, confirm the password, and hit Enter.
You’ll now receive a system warning that a disk must be repartitioned.
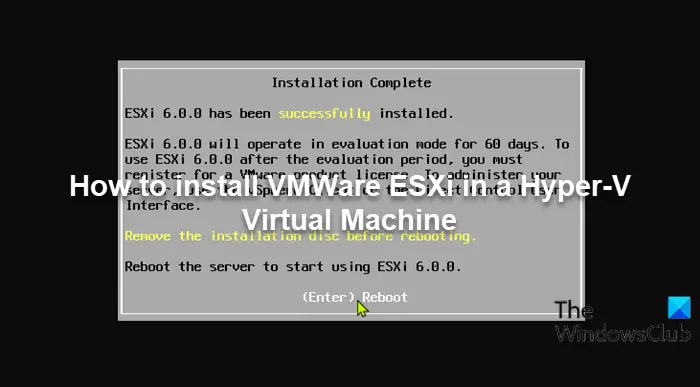
Press F11 to begin the ESXi installation.Wait until the installation process is finished.When installation is done, a reboot is required. Press Enter to reboot.
That’s it! On boot, the VMware ESXi is installed in a Hyper-V Virtual Machine and ready to be used. Read: How to Install Windows 11 on Oracle VM VirtualBox.
How do I connect to ESXi virtual machine?
You can connect to ESXi virtual machine via the virtual machine console in vCenter Server. To do this, follow these instructions: log in to the vSphere Web Client. Locate a powered-on virtual machine from the inventory and select it. Then, navigate to the Summary tab and click the blue Launch Console link – the virtual machine console should now open and you can be able to access the VM’s guest operating system. Related post: How to install Windows 11 on VMware Workstation Player.