Insert word count in Microsoft Word document
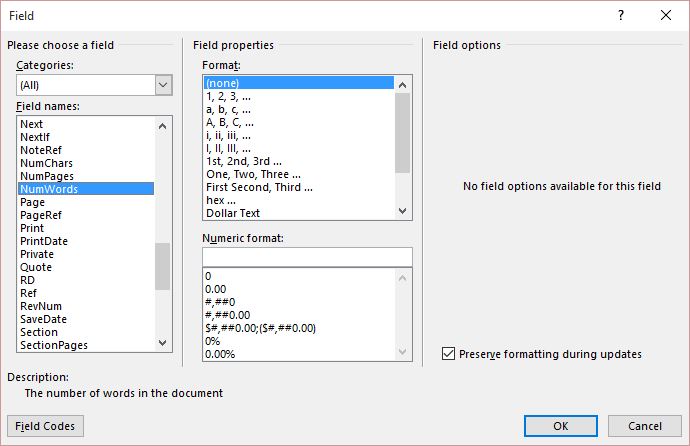
Let’s get this show started. First, you will need to place the mouse cursor on the section of the document where you want the word count to appear. After that, click on the “Insert” tab at the top of Microsoft Word, and then search for “Quick Parts” in the “Text” section and click on it. Now, if for some reason the “Quick Parts” option is not showing because your Ribbon Bar is not broad enough, then you will need to follow this easy tip. Look for the “Text Box” option, and beside it at the top, the first button should be the one you’ll need to click to get “Quick Parts” up and running. From the drop-down menu, click on “Field” and then “Document Information” from the “Categories” drop-down menu. Hey, we’re almost done here so don’t run off just yet. Click on “NumWords” from the “Field Names” section on the left. You should now see options called “Format” and “Numeric Formats”. Don’t be scared of all the words and numbers, we’ll get you through this without a sweat. These options are used to specify a format for the field being inserted into the document. However, since we are not going to add a regular field, there is no need to dabble in those options. Just click “OK” and be done with it. Now, whenever you add or delete words in your Word Document, naturally the number should change. But bear in mind that it is not automatic, and we’re not certain if there is an option to allow it to change without interference. This means you will have to make changes manually by right-clicking on the word count and select, “Update Field.” We wish Microsoft had made it easier to add this field into a Word document instead of having to make so many clicks. But hey, at least it is possible, and now you have just learned something new today. Random read: How to Turn Photos into Paintings?