How to fill Text with Image in Photoshop
Inserting an image into text in Photoshop can be an expressive way to write. It could be a picture of a sunny valley in the words sunshine or happy or any word that brings that to mind. This method of inserting the image into the text is quite easy to do and remember.
1] Choose an image
This step may seem like it is simple, however, it is very important. The image will enhance the text and a good image will make a much better statement. Find an image that brings out the text, for example using a beach scene in the text Vacation. You can find images on trusted websites or you may take your own pictures on your camera then digitize them and add them to the text in Photoshop. You can use one image or create a collage and then add it to the text.
2] Choose text
Choosing the appropriate text is also very important. It is important to use text that will make the image show up properly. Use strong bold text that will serve as a proper base so that more of the image will show.
3] Layer order
When the image has been placed in photoshop it will go on a layer of its own. When the text is written it will also go on a layer of its own. For the next step to work, the images have to be above the text. If the image layer is below the text layer you can simply click it and drag it above the text layer. It is also a good practice to place the image over the text on the canvas, that way it will not disappear when the clipping mask is created. When all is in proper order, move on to the next step.
4] Make clipping mask
Now that the image is above the text, it is time to make the clipping mask.
To create the clipping mask, right-click on the image and choose Create clipping mask.
The image will disappear and go into the text. you should be able to see the image inside the text. if you cannot see the image then it means that the image may be hidden in the corners, you may have to drag the text around until you see the image. you can also right-click on the image layer and choose Release clipping mask, you then position the image better over the text then right-click and Create clipping mask.
5] Make adjustments
You can still make adjustments to the image by holding it and positioning it within the text. move the image around inside the text so that you get the best parts of the image to show from within the text. if you are not satisfied with the image or the text, you can make changes to the test without releasing the clipping mask. Just use the text tool and select the text, then scroll through the texts until you find a satisfying one. To change the image you will have to release the clipping mask then change the image and then redo the clipping mask.
6] Make other enhancements
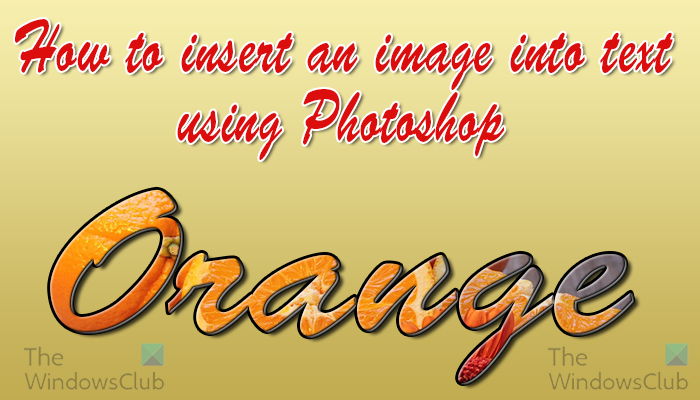
You can enhance the look of the artwork by making some additions. The background can be charged, a stroke added to the text and a drop shadow added to the text.
This is is the finished artwork with a gradient background, a drop shadow, a pillow emboss, and a stroke. When all adjustments are finalized, select both layers and click the Link layers icon at the bottom of the layers panel. Read: How to make a Silhouette in Photoshop
How put an image into text in Photoshop?
The steps involved are:
Can you fill text with a picture in Photoshop?
It is possible to fill text with a picture in Photoshop. You would have to break up the text so that each letter is on a different layer, make sure that the corresponding image is over each layer, would then right-click on the corresponding images and choose Create clipping mask.