The error message appears during both quick and full scans.
Enable Network scanning in Windows Defender
There are three ways to disable or enable Network scanning in Windows Defender on Windows 11/10. Each of these will allow network scanning. Depending on the Windows version, and your privileges, you can choose one of them.
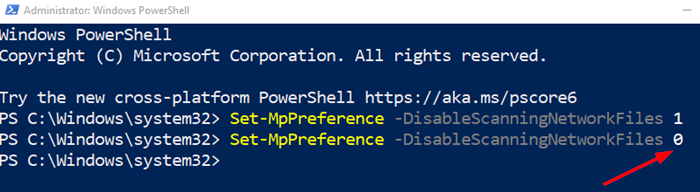
1] PowerShell Method
Launch PowerShell with admin privileges Type and execute the command: Set-MpPreference –DisableScanningNetworkFiles 0 There is no output for this command, so you will have to copy a file from the network and see if you still receive the error. If you want to disable it, set it to 1.
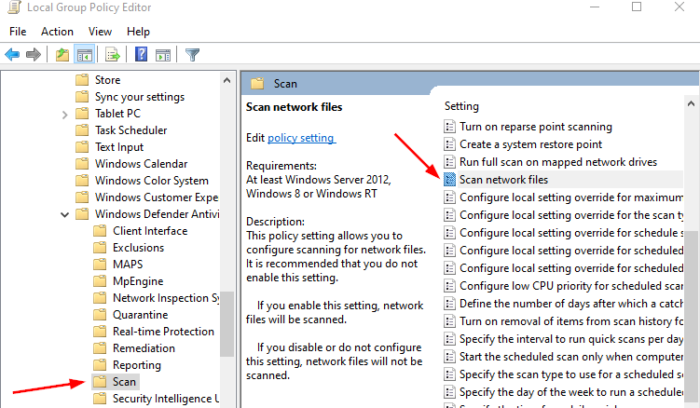
2] Group Policy Method
Open Group Policy editor and go to: Double-click Scan network files and set the option to Enabled. Then click, OK. Once you enable the setting, all network files will be scanned. The default setting is not to scan any of the network files.
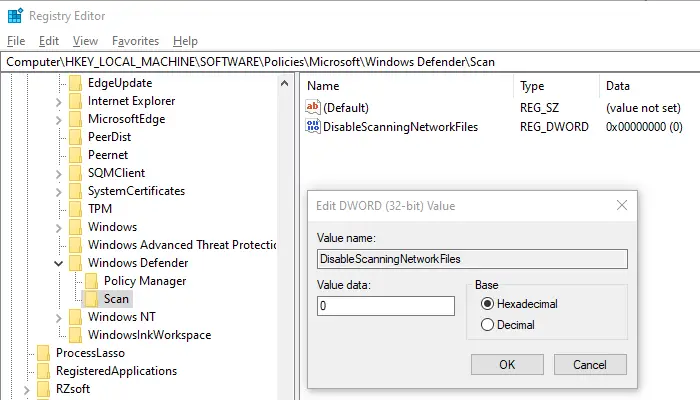
3] Registry Editor Method
If you are using Windows Home, you can try changing registry values as Group Policies are not available for you. Open Registry Editor and navigate to: Right-click on Windows Defender and create a Key (folder) with name Scan Under scan, create a new DWORD with name DisableScanningNetworkFiles Set the value of the DWORD to 0 to enable scanning. Close the Registry, next time you copy a file from the network; it will be scanned. You can copy the key and import it into another computer to apply it instantly. I hope the post was easy to follow and can now scan the network files. TIP: You can also scan Mapped Network Drives with Windows Defender on Windows 11/10.