Disk Quota Features
It only works on NTFS SystemNeeds Admin permission to setupIt only applies to physical storage and partitionsYou can apply disk quotas and partitions simultaneouslyThe uncompressed file size is counted against the quota limit
How to enable Disk Quota for Users in Windows 11/10
First, makes sure where you want to apply the Disk Quota limit. Since it cannot be applied to folders, you will have to apply to disk. While you can, I would suggest not restricting user quota on the primary drive, but on the rest of the partitions. It will help you pinpoint if they store everything on their desktop. Follow the steps to get it done.
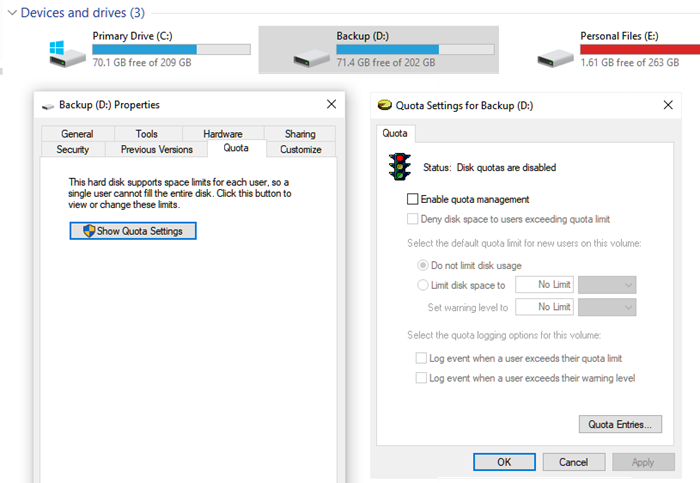
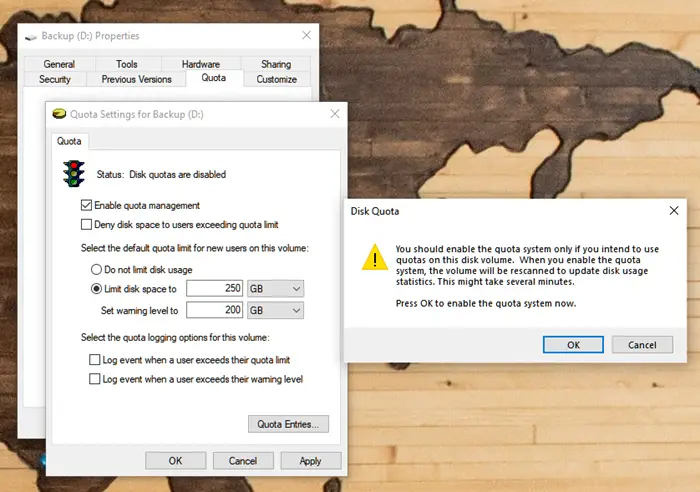
Open File Explorer, and go This PC folder on the left panel.Right-click on the drive on which you need to enable Disk Quota, and select Properties from the context menu.Switch to Quota, and click on Show Quota Settings buttonThis will reveal the settings that can be configured for that partition. Check the box, and all the configuration will be available.Deny disk space to users exceeding quota limitLimit Disk space with warning levelEnable Quota logging for warning and exceeding of the quota limitOnce you apply the settings, the volume or the drive is scanned to update disk usage statistics.
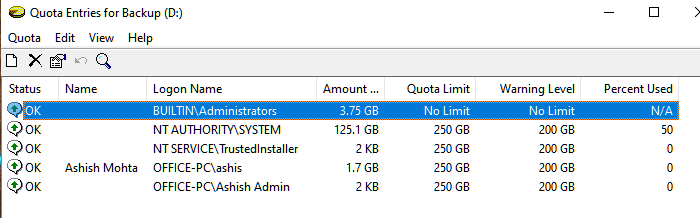
You can further check the details when you click on the Quota Entries button, which reveals how much space is occupied by each user on the system against the Quota. You can see the amount of current usage, warning limit, warning level, and percent used.
Enable Disk Quotas for specific users
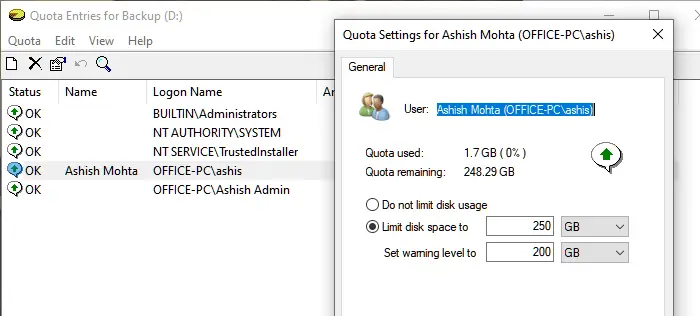
If you want to have a different Quota for different users, then you need to use the Quota Entries window for that drive. Once you open it, right-click on the Logon Name of the user, and select Properties from the context menu.
Here you can choose to set disk space and warning quota, which can be different from the rest of the users. It’s an excellent option if you do not want to have any quota for administrators, but for the rest of the users, you can do so.
Enable Disk Quota using Registry Editor
Open the Registry Editor and navigate to the following key: Here you will see a key/folder named DiskQuota. If you do not see it, create it. Now in this key, right-click on the right side and create a new 32-bit DWORD value, name it Enable and give it a value of 1.
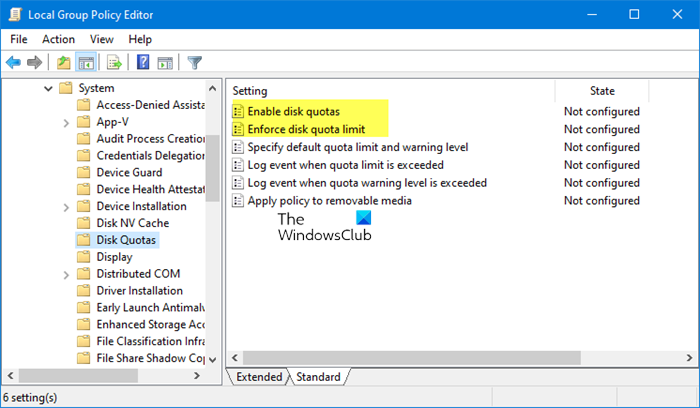
Enable Disk Quota using Group Policy Editor
Open the Group Policy Editor and navigate to the following settings: Set Enable disk quotas to Enabled. Trust this helps! Now read: How to Enforce Disk Quota Limit in Windows 11/10.