Paint.NET also comes with the feature to set the opacity level for the entire image. So, instead of making the image background transparent, you can simply make the entire image semi-transparent or set the opacity level as per your needs to adjust image transparency. This post covers both ways.
Create a Transparent Image in Paint.NET
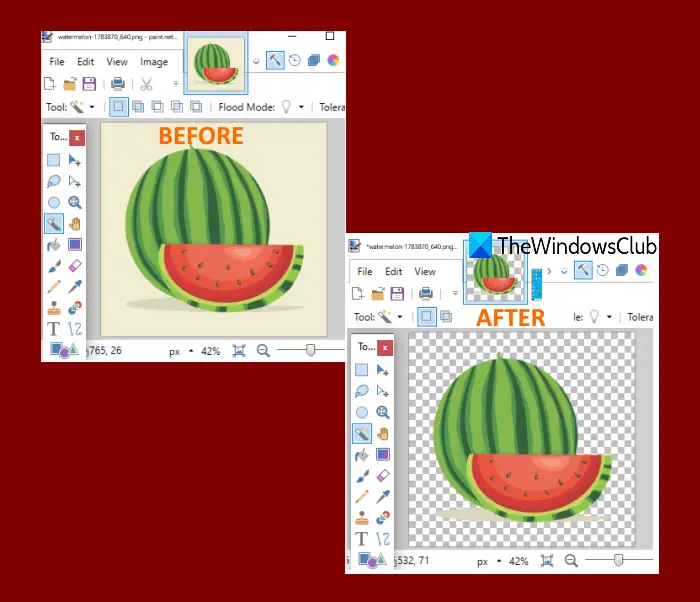
Open Paint.NET using its desktop shortcut or Start menu. After that, use the File menu in Paint.NET to open an image whose background you want to remove. After that, press the F5 hotkey to open its Tools. It will appear on the left side (see image below). There, select the Magic Wand tool.
Now press n hold Ctrl key and use the left mouse button to select areas using the Magic Wand tool that you want to remove or make transparent. Carefully select areas. If the Magic Wand tool selects other areas or pixels that you don’t want to remove from the image, then adjust the tolerance level using the available slider, as visible in the screenshot below.
You might need to repeat this process multiple times until you get the exact areas or pixels. In addition to that, you can also take the help of the Zoom-in option and Eraser tool to select correct areas and remove/add pixels. This might take time but you have to do it precisely to get a good output. Once you’ve done that, press the Delete key. You will notice that all those areas are removed and the background is transparent now. Finally, you can save the image as PNG or another format that supports transparent background using Save as available in the File menu.
Set the opacity level to adjust image transparency
In case, you don’t want to make the image background transparent but adjust the transparency level (between 0-255) of the whole image, then you can use other steps. For that, open Paint.NET and add an image. Now press F4 hotkey, you will see the Layer Properties box. In that box, move the Opacity slider from left to right to adjust the image transparency from 0 to 255. Less will be the opacity, more will be the transparency level of the image, and you will also be able to see the changes in the image in real-time. Settings opacity level to 0 will make the image completely invisible and that won’t make any sense. So, adjust the opacity level as per your needs. When the transparency level is set, press the OK button. After that, you can use Save as in the File menu to store the output image in any folder. Hope it is helpful.