How to create labels in Word from Excel spreadsheet
The ability to create labels in Microsoft Word from an Excel list is easier than you might think. Still, it will take some effort on your part and the steps involved are as follows:
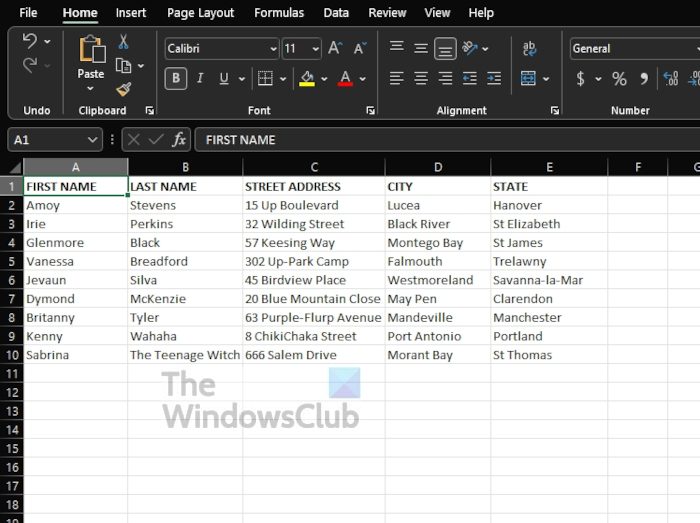
1] Use Microsoft Excel to enter data for your labels
To begin, we must first create an Excel spreadsheet and then inject the relevant data. An applicable header must then be assigned to each data field as this is important for retrieving the headers in Microsoft Word
Launch Excel: Open Microsoft Excel on your computer, whether it be Windows or the Mac variety. From there, create a new spreadsheet.Add a name: When the spreadsheet screen appears, click within the first cell via the first row and type First Name.Add a last name among other things: From the B column, you will want to select the first cell and type, Last Name. Now, in terms of the C, D, E, and F columns, add Street Address, City, State, and ZIP Code to the first rows respectively.Populate the headers with data: It is now time to add the relevant data under each teacher you’ve just created.Save your spreadsheet: After you’ve added all the required data, click on File at the top of the document and from there, save your spreadsheet.
2] Put together the labels in Microsoft Word
OK, so the next thing to accomplish here is to set up the dimensions of your labels from within Microsoft Word. You do not have to do a lot here since there are quite a few predefined label layouts available. However, if you want to go the custom route, well, we will leave that up to you.
Launch Microsoft Word: Open the Microsoft Word app on your Windows or Mac device, and once you’ve done that, go on ahead and create a new document.Navigate to the Mailings tab: Look to the tabbed section from within the document area and select Mailings.
Select Start Mail Merge: If you’ve done all things correctly, you should now come across several options. Please avoid all and only choose Start Mail Merge, and from the dropdown menu, click on Labels.Choose a Label Vendor: From the newly opened Label Options window, you must choose a Label Vendor from the list. The default vendor is Microsoft so you can stick with that if you want.
Select a Label Type: Look to the Product Number list and choose a label type that fits your requirement, then complete it by hitting the OK button. Your label layout is now created, but ensure not to close the document.
3] Import the Excel data into your Word document
With your labels created and ready to be used, it is now time to import the Excel spreadsheet information. There is no need to launch Excel to get this done, so for now, focus your time on Word.
Go to the Mailings tab: Return to the Word document and select the Mailings tab.Use Existing List: Click on Select Recipients via the Ribbon where a dropdown menu will be revealed. From this menu, please click on Use an Existing List.Import Excel spreadsheet into Word: From the File Explorer window, search for the Excel spreadsheet we’ve created earlier, select it, then import the document into Word.Select the spreadsheet from a list: A window with the name, Select Table should now appear. From there, choose the spreadsheet that holds the label data, and then tick First row of data containing column headers.Select OK: Click the OK button right away.
4] Add the labels from Excel to Microsoft Word
It is now time to specify the fields you’d prefer to use in your labels when added to the Word document.
Go to Address Block: From the same Word document, click on the Mailings tab again then select Address Block from the Write & Insert Fields section on the Ribbon.Select Match Fields: When the Insert Address Block window appears, please click on the Match Fields button promptly.All fields must match Excel data: From the newly opened window, ensure that all fields match the heading data from the Excel document.Hit OK: Once the information is confirmed as legit, click the OK button.View preview of your work: You should now be looking at a preview of the labels. If you’re satisfied with the possible outcome, hit the OK button located below the window.Go over to Update Labels: Again, click the Mailings tab and then promptly select Update Labels.View your label: Every label in your document should now read, «AddressBlock».
5] Create the labels from Excel in Word
At this point, Microsoft Word should have all the data needed to generate labels. With all this information, Word will showcase the data for each label inside.
Edit Documents: Via the Mailings tab, click on Finish & Merge, then select Edit Individual Documents.Choose the All option: From the Merge to New Document window, select All > OK.
6] Save the document as a PDF
Finally, we suggest saving the entire Word document with the labels as a PDF. Read: Convert JSON to Excel using free online converter tools
Is there a label template in Word?
There are multiple label templates in Microsoft Word that are available to use for free. Simply open Word, then click on More templates. Finally, search for the word, Label, and you’ll see several show up in the results.
How to print labels in Word?
That is super easy. Once you’ve accomplished the task of creating your labels, go ahead and select File > Print. Choose your printer, then hit the Print button to complete the job.