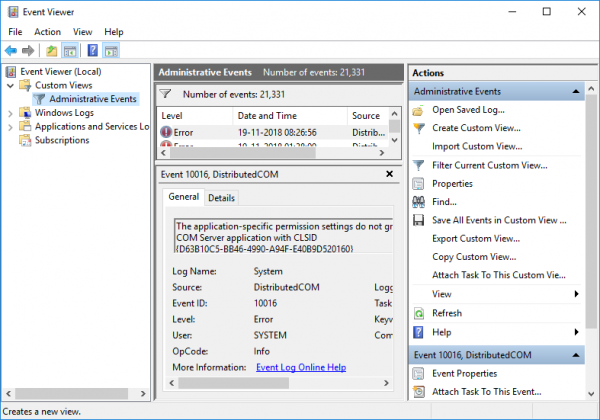
Fortunately, the Event Viewer allows its user to create custom views. You can set the filters and sort the recorded data to limit the information details to only what you are interested in. Suppose you want to troubleshoot with one hard drive, you can create a special custom view to display only the hard drive warnings in the security logs. In the Event Viewer, the logs are divided into two main categories: The Window logs and, Application and Services logs. You can set the filter to the logs by their specific date, event ID, and many other events when you need to troubleshoot your system. In this article, we explain how to create custom views in the Event Viewer and save them to limit the log information details only to display what you are interested in viewing.
Create Custom views in Event Viewer
Go to Start menu and type Event Viewer in the search box. Click on the Event Viewer to launch it. In the left pane of the window, click on Custom Views.
Under the Custom View, you will see Administrative Events provided by Windows. To create special log views, Click on the Administrative events. Click on Create Custom View on the right side of the window to open Create Custom View window. Under the Filter, there is Logged drop-down list. You can either choose an appropriate predefined time or use a custom time range for your Custom log views.
Now choose an appropriate event level for your custom view. You can choose among five entry-level options like critical event level, error, warning, information and verbose. If are troubleshooting or you want to see the events that require your immediate attention in the custom view, select the event level Critical. If you want your Event viewer to display the events that are less critical but hints at the problems, select the event level Error. The Warning event-level displays the event with the potential problem but they may not be bound to happen. If you want to know detailed information about all the events, choose the event level Verbose.
Once you select the event level, next is to choose how you want the events to be filtered. The events can be filtered either By the log or By source. In the By log, you can select two options called Windows log and, Application and Service logs; The Windows log lets you filter the logs created during the events like security, setup, applications, and system events. Application and Service logs filter the log created by the installed applications on your system.
If you want your Custom View to search for information in event sources, click on the radio button By source. In the By source, you can choose to view events in detail for various applications and devices.
Once done you can further customize the logs with additional filters like Event IDs, task category, keywords, User and Computer. With the help of these additional filters, you can choose to filter the events in the special views by specifying event id numbers in the Event IDs, entering predefined Windows words in the Keyword, specifying the user accounts in the User field and also choosing the system from the server to maintain logs in the Computer field Once you are ready with customizing the log filter, click OK to apply the changes. At last, a Save Filter to Custom View window is displayed. Enter the Custom View name and select the Event Viewer folder where you want to save the Custom view. By default, the folder name is Custom View. You can also create your own new folder if you want your custom views to be visible to all the system users. Check the All Users box in the lower corner of the window. Once done, hit the Ok button.
You can now see your customized filter on the left side of the window. Click on it to check your filtered events in the center of the Event Viewer window. To save the custom view logs in the Event Viewer, right-click on the Custom views you created. Click on Save All Events in Custom View As from the drop-down menu.
Give the file name and choose the appropriate location where you want to save the logs. Click on Save button. The log file is saved with .EVTX file extension and, double-clicking on the file, opens it in event viewer. Hope you find the post useful. Related reads that are sure to interest you:
