Hanging indentation looks different than other stylings in a document. If you apply this style, the first line of a paragraph will stick to the page margin whereas other lines will be requisitioned. Whether it is for a webpage or an offline document, you can display such indentation to make it engaging.
Create a Hanging Indent in Word
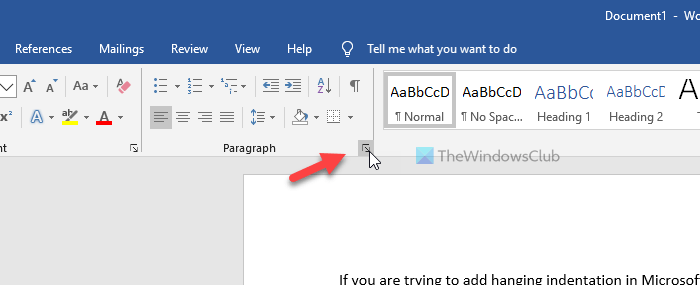
To add a hanging indent in Microsoft Word, follow these steps- Open the document in Microsoft Word. After that, select a paragraph to add the style. You can choose the whole paragraph with your mouse, or you can click on a sentence in your paragraph. Then, click the arrow button in the Paragraph section. The Paragraph heading should appear in the Home tab, and the arrow should be visible at the bottom-right corner.
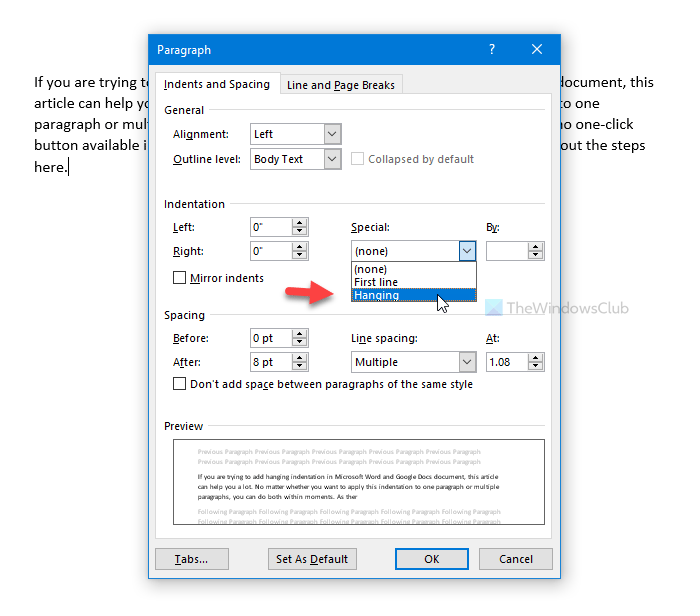
After that, make sure that you are in the Indents and Spacing tab. If so, click the Special drop-down list under the Indentation section, and select the Hanging option from the list.
You can change the indentation size as well. For that, use the By option to increase or decrease the size. At last, click the OK button to save the change. It is possible to save all these changes as default settings. For that, click the Set As Default button, select All documents based on the Normal.dotm template and click the OK button.
Add Hanging Indent in Google Docs
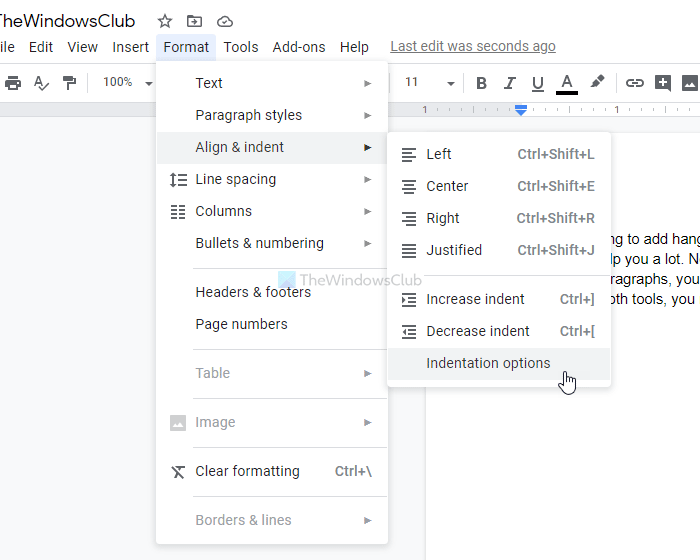
To create a hanging indentat in Google Docs, follow these steps- To get started, open a document in the Google Docs and select a paragraph where you want to display the styling. After that, go to Format > Align & indent > Indentation options.
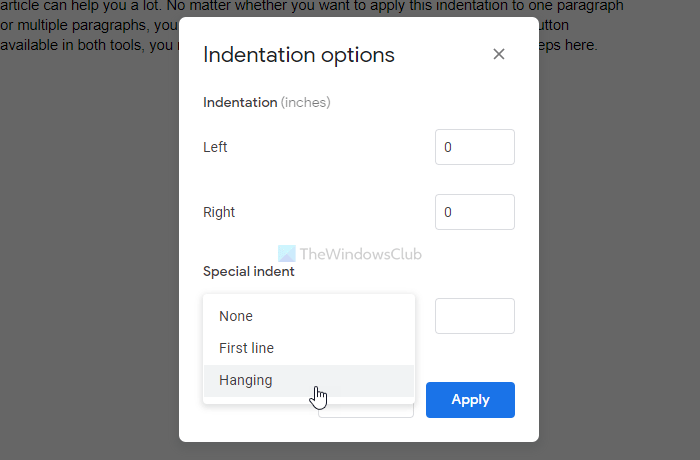
Following that, you need to click the Special indent drop-down list and select the Hanging option. From here, it is possible to choose the indentation size as well.
Finally, click the Apply button to make the change. That’s all! Hope it helps.


