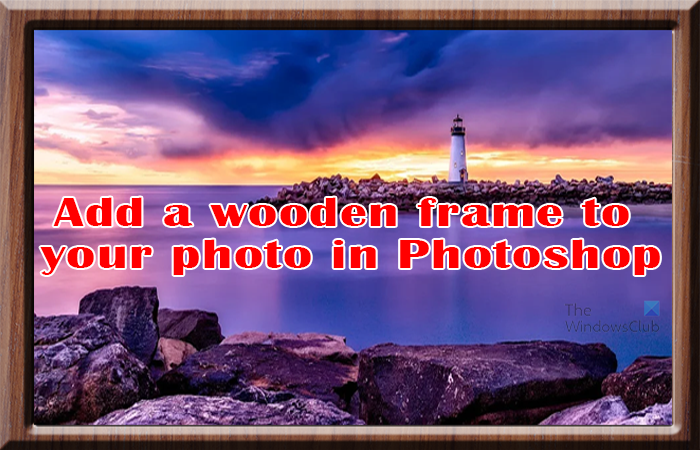
How to create Wooden Frame for a Photo in Photoshop
There are two easy ways to add a wooden frame to your image. These methods can be used to add any type of frame to your image. framing images can help them stand out and the frames can be chosen to fit the occasion of the image. the method that will be used here will entail cutting the space for the photo in the wood color image.
1] Open and prepare Photoshop
The first step is to open and prepare Photoshop. When photoshop is opened go to File then New and the New document dialogue box will open. Enter the desired information for the document you want to create and press ok. The dimensions you choose for the canvas can be a little bigger than the photo you will use. Take into consideration the size of the photo and the frame. The canvas will be created to your specifications. If you have a size that you have to work with then create the canvas to that size then make the wood color image and the photo fit into that size. The alternate option would be to find the wood color image saved on your computer then right-click on it and choose Open with then Adobe Photoshop (version). This image will be used as the background. You would then add the photo to the wood color image background. If you decide to use the pattern as the frame then you would create the canvas first. You could then double-click on the canvas background layer and make it a layer, then apply the pattern to it. you then move to the next step.
2] Add both images to Photoshop
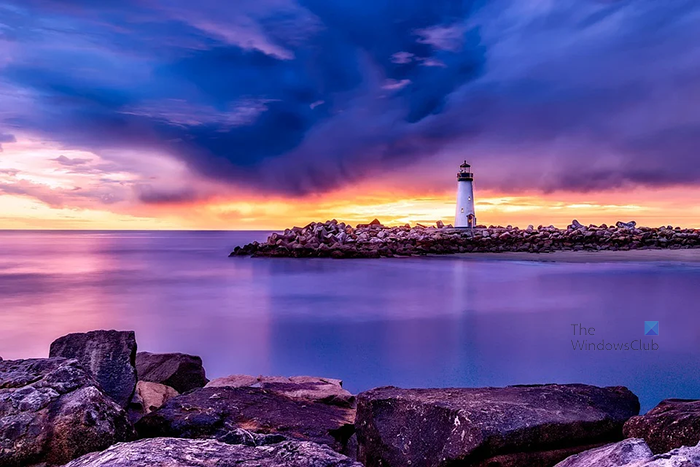
This is where you will add the image for the frame and the Photograph to Photoshop. You may also use one of the patterns available in Photoshop to create the frame. In any case, the image or pattern for the frame will go below the photo. This means you will add the image for the frame then add the photo in Photoshop. You can always change the layer order after if you get them wrong. This is the photo that will be added to the frame.
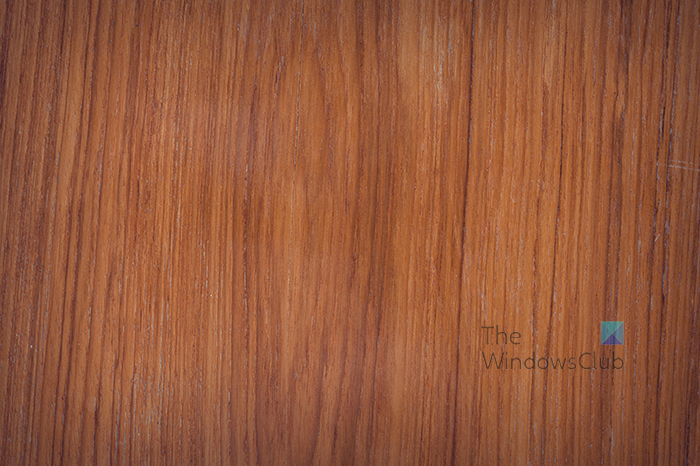
This is the image that will be used as the frame. Adjust both images Depending on the sizes of the wood color image and the photo, you will need to make some adjustments. Place the photo at the center of the wood color image. This is not the golden rule, however, since frames do not necessarily have to be the same size all around. You can choose to make a unique frame for your photo so place the photo in the spot that fits your design. This article will go for the centered photo. When the photo is on the wood color image, make the adjustments. To fit the images, you may have to use transform to make the images fit perfectly. Align with ruler and guides If you do not want to align the photo on the wood color image by sight you can use the ruler and the guides.
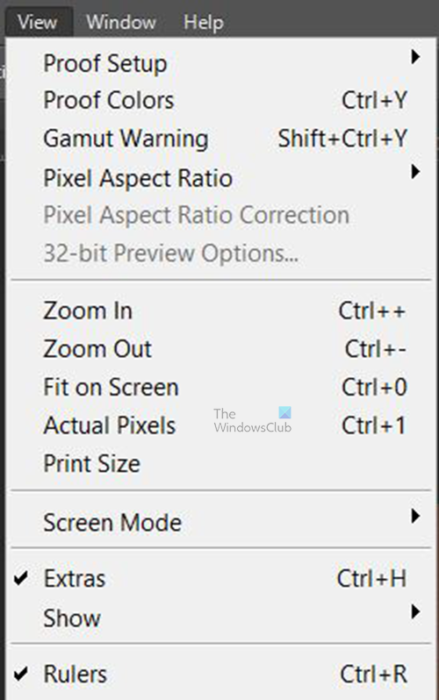
If the ruler is not visible in the work area go to the top menu bar and press View then Ruler or press Ctrl + R. The ruler will be added to the top and left of the work area. You can then add the guides to the canvas so that you can see exactly where to place the photo. To add the guides to the canvas, click on the ruler and drag towards the canvas, to get a horizontal guide click the top ruler. To get the vertical guide click the left ruler and drag towards the canvas.
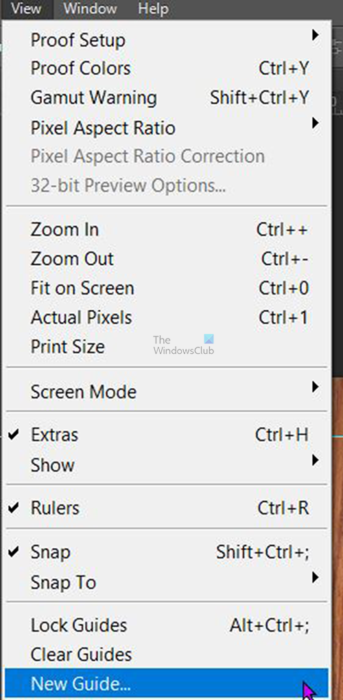
You can also add the guides by going to the top menu bar and pressing View then New guide.
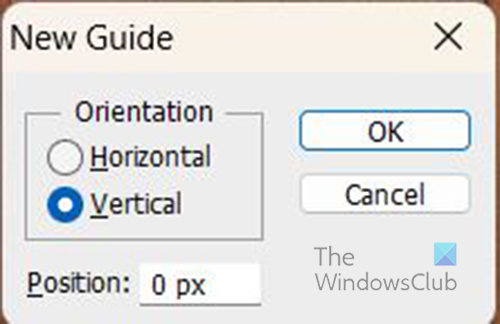
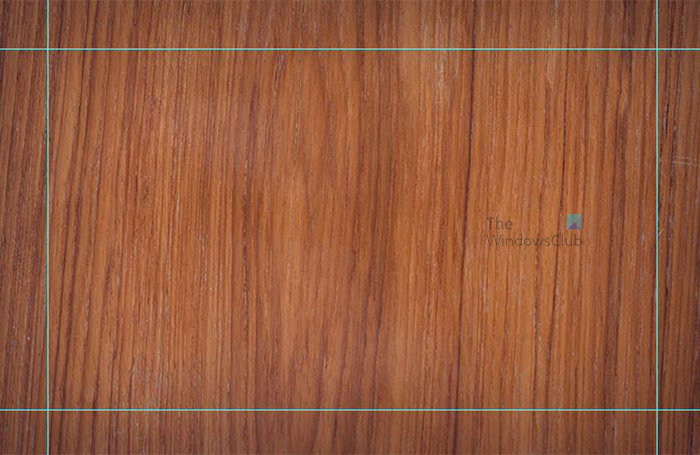
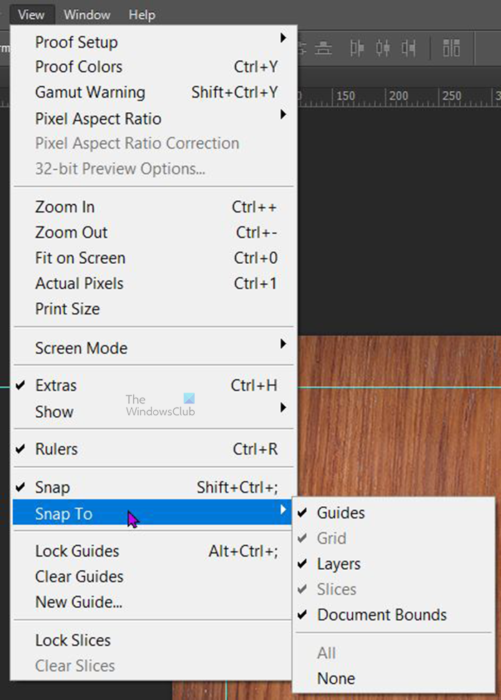
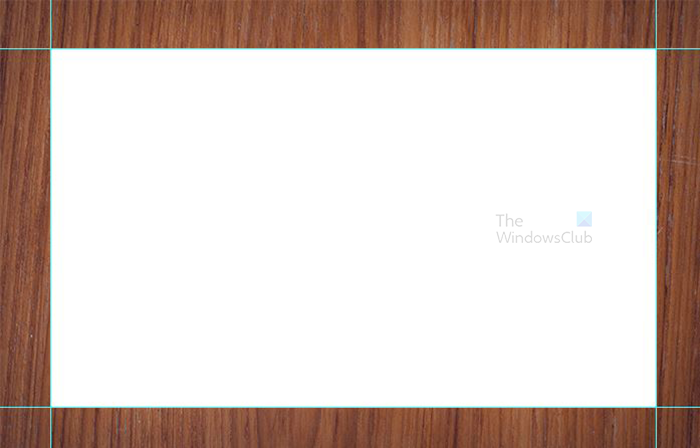
You will see a dialogue pop up for you to choose the orientation for the new guide (horizontal or vertical). You will also enter the position where you want the guide to go. You can enter a number that fits the number of pixels or you can enter a percent. For example, 33% would put the guide at one-third of the size of the canvas with whatever orientation you chose. When you press Ok the guide will go t that position on the canvas. This is the image with the guides, the photo would fit right between the four guides. You could use the Rectangular marquee tool to cut and then fit the photo in the space. If you cut the wood color image from this step, you would need to turn off the photo’s visibility so that you can see to cut. To turn off the photo’s visibility, click on the eye icon beside the photo’s layer in the layers panel. To be sure that you can cut accurately at the guides go to the top menu and click View then Snap to and make sure Guides is checked. Cut To cut from this step you would go to the left tools panel and select the Rectangular marquee tool. You would then click the top left corner and drag it down to the bottom left corner. When you see the space selected, press delete. This is the image with the space cut for the photo. The cut was made using the Rectangular marquee tool and the guides for accuracy.
3] Convert images to Smart object (Optional)
You can choose to convert the images to Smart objects. Converting the images to Smart objects will make them keep their original image data and will keep the image quality. The images will also be easy to change out if you need to recreate the effect on other images.
4] Use the rectangular marquee to cut the wood color image
This step will require that the wood color image be cut. You would use this step if you did not cut when you added the guides. This step also requires that the photo be visible. The photo should be placed on the wood color image at the exact spot that you want it to be in the frame. With the photo fitting at the correct spot click the Rectangular marquee tool from the tools panel. You would use the Rectangular Marquee tool to select around the Photo. Ensure that the wood color image’s layer is the one selected. Since the images are Smart objects, you will have to right-click on the layer with the wood color image and choose Rasterize layer. Rasterizing the layer will convert it back to a regular layer that can be edited. When you have finished cutting and discarding the unwanted piece you can Convert the image to a Smart object again. You can see the wooden frame forming now that the middle is cut. It is time for the next step.
5] Add the photo to the space
With the wood color image cut and the space in the middle, it is time to add the photo. You will need to turn on the visibility of the image in the layers panel. In this case, the photo is larger than the space that was made for it. You can choose to cut it where the guides are and it will fit, or you can press Ctrl + T to bring up the transform box. You would then make the image smaller so that It fits in the space that was cut for it.
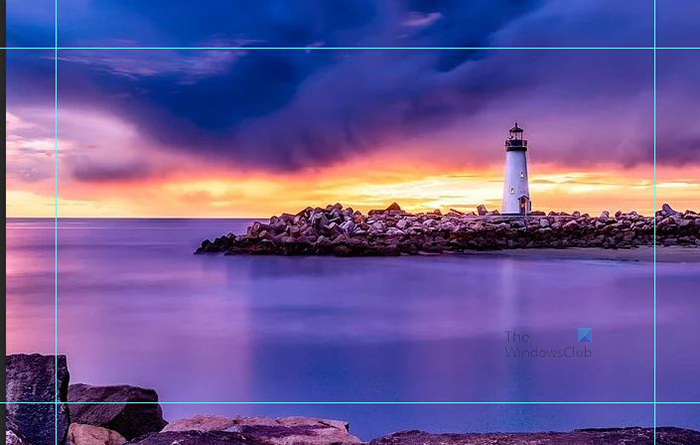
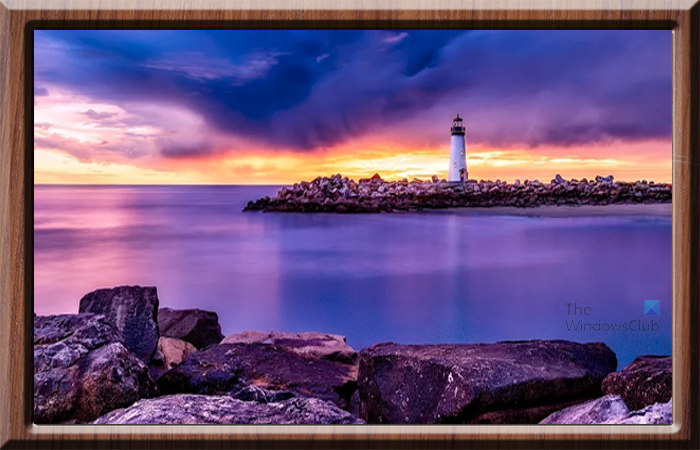
This is the image made smaller to fit in the space made for it. You may want to make the image zoom in more so that the subject is more visible. In this case, the lighthouse is the subject. You can use the rectangular marquee tool to select the part that you want to delete. I would cut a piece of the sky at the top. Can you notice any changes in the size of the subject? You can choose to remove more of the image, possibly from the sides. This would depend on your image and what look you are trying to achieve.
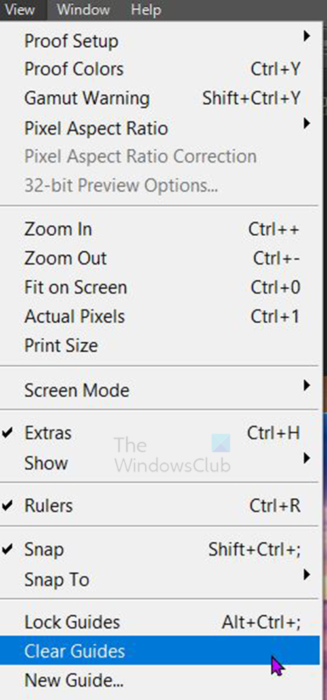
When you are satisfied you then remove the guides. To remove the guides go to the top menu bar and click View then Clear guides.
6] Add layer styles to the frame
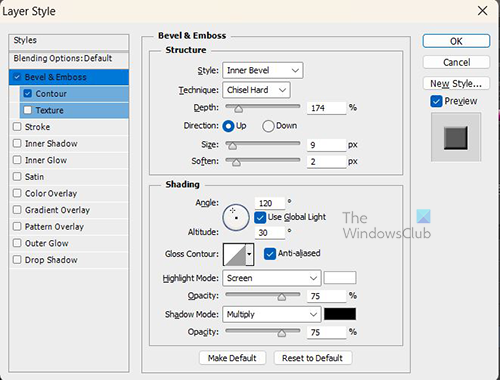
This is the time to add some styles to the frame to enhance the look. Right-click on the wood frame layer and choose Blending options. The layer style window will appear. In the layer style window click on the word Bevel and emboss. For the style choose the Inner bevel, and choose Chisel hard for the Technique. Adjust the depth while keeping an eye on the image, and stop at a value that is satisfactory to you. Adjust the Size as well. Moving the slider slowly so that you can see the changes and stop when you are satisfied with the look. Under the words Bevel and emboss you will see the word Contour, you click on the word Contour and adjust the range. While still under Contour click Anti-aliased. You can experiment with other settings and see what works for you. When you are finished click Ok to confirm and close or click Cancel to close without keeping any changes.
7] Add layer styles to the Photo
You can add a Layer style to the photo as well. Right-click on the photo layer and choose Blending mode. The layers style window will open. Click on the word Bevel & emboss. Give it an Outer Bevel style and a Smooth technique. Go down to the Gloss contour and click on the thumbnail and click Ring. You can experiment with other settings and see what works for you. When you are finished click Ok to confirm and close or click Cancel to close without keeping any changes. This is the final image of the photo in the wooden frame. Read: How to recolor objects in Photoshop
Is there another way to add the image to the frame?
You could add the image to the frame by using a layer mask. The layer mask would be used on the wood color image so that you would not need to cut it. You would use a Layer mask to hide the part of the wood color image that would have the Photo. This would help to keep the wood color image intact and it would remain as a Smart object. This would also mean that if you need to repeat the process with other images, you would just edit the Smart objects. The process could be repeated in a very short time since you would not have to do over everything.
What is Bevel & Emboss?
Bevel & Emboss is where an image, shape, or text is given a slightly 3D look. The bevel is like a raised surface added to the object. This is achieved using light, shadow, angles, and color variations. You can adjust the settings to make the bevel more or less.