What is the Horizontal Line feature in Outlook?
The Outlook Horizontal Line feature adds a horizontal line across the entire page cell or column; it is used as a separator for long email messages.
How to add Horizontal Line in Outlook email
To insert Horizontal Line in the Outlook email messages, follow the steps below-
Using the Insert tab
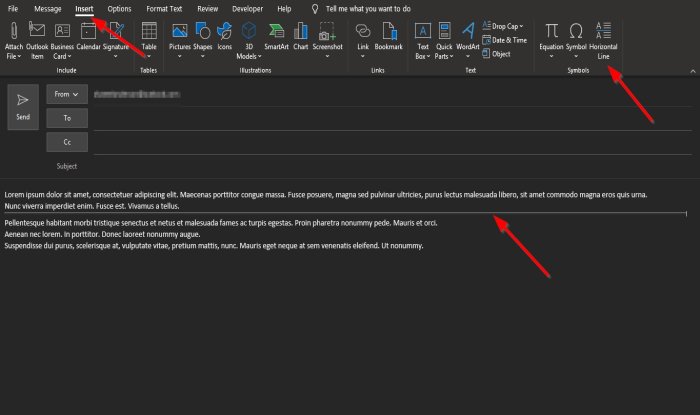
On the New Email interface, click within the message section. Click within the email message where you want the horizontal line to go. On the Insert tab in the Symbols group, click the Horizontal Line button. The line will appear in the message separating the paragraph into sections and is inserted for the full width of the page.
Using AutoFormat
The other method you can insert Horizontal Line into your message is to used AutoFormat feature. If you type three characters at the location of the paragraph, you want to separate. This method is quick and easy. Type the characters below in between the paragraph in the email message:
Hyphen: *** then press Enter.Equal sign: === then press Enter.Underline: ___ then press Enter.Asterisk: *** then press Enter.Number sign: ### then press Enter.Tides: ~~~ then press Enter.
Each of the characters above will give you a different style of Horizontal Line to use as a separator within your messages.
How do I put a horizontal line through text?
You need to use the Strikethrough feature. Select the text you want to line out, then on the top select the Format tab. Next, click on the strikethrough icon and a line will be put through the text. We hope this tutorial helps you understand how to insert Horizontal Line in Outlook emails.