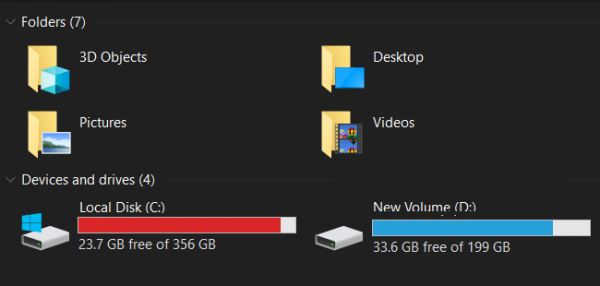
In this post, we take a look at two scenarios. The reasons would be different and then so would the troubleshooting:
Hard Drive keeps filling up by itself automatically
The System Drive could be filling up automatically for several reasons. If you have been installing and uninstalling software, it could end up bloating your WinSxS folder with orphaned DLL files. You need to check the space allocated to System Restore Points and also disable Hibernation file – or it could be excessive log files (.log) being generated for errors occurring on your system. Before you begin, use a free Disk Space Analyzer software to find up which of your folders on which drive are consuming excessive space. If you find any non-system folders occupying disk space, with data, download, etc, files, then delete all such files that are not required, manually. Once you get an idea, here is what you need to look at if your C (System) drive or your D (Data drive) keeps filling up by itself automatically for no reason on Windows 10/8/7.
Fixes applicable to C System Drive Only
The following fixes apply to the C System Drive only,
1] Managing the Hibernation Settings
Press WINKEY + X button combo or right-click on the Start button and click on Command Prompt (Admin). Click on Yes for the UAC or User Account Control prompt that you get. Then, the Command Prompt window will finally be open. Now, type in the following command to disable Hibernation and then hit Enter.
Close the Command Prompt window. However, if you note, this method applies to the System Partition only. This is usually the C: partition.
2] Perform WinSxS folder cleanup
Perform WinSxS folder cleanup to reduce the size of the folder.
3] Check installed software
Check if any installed software is misbehaving and eating up disk space. Maybe it is generating a lot of log files (.log). Installing the software is the only option in this case.
Fixes applicable to both C System Drive and D Data Drive
The following fixes apply to the C System Drive as well as the D Data Drive,
1] Fixing File System Corruption
Start by pressing the WINKEY + X button combo or right-click on the Start button and click on Command Prompt (Admin) or search for cmd in the Cortana search box, right-click on the Command Prompt icon and click on Run as Administrator. Click on Yes for the UAC or User Account Control prompt that you get. Then, the Command Prompt window will finally be open. Now, type in the following command to run chkdsk and then hit Enter.
It will either start checking for errors and fixing them. Else it will show up a message saying, Then, you can hit Y for scheduling the Disk Check the next time the system restarts.
2] Detecting and removing malware
There can be some serious malware infection on your computer which could trigger such type of behavior. To fix this, you can perform a full system scan, a quick scan and a boot-time scan from Windows Defender or any other antivirus software that you are using.
3] Manage the System Restore Points
To configure the disk space used by system restore points, right-click on the This PC icon and then click on Properties. On the left side ribbon, click on System Protection. Then a mini window will pop up. On the bottom side of that mini window, click on Configure. Another mini window will now pop up. Under the section called Disk Space Usage, you can move the slider to toggle the maximum storage that can be used while creating a System Restore Point. You can also select the Delete button to delete the created system restore points or toggle to enable or disable the system restore points. Click on Apply and then OK for the changes to take effect.
4] Run Disk Cleanup
Run Disk Cleanup Utility.
Type in Disk Cleanup in the Cortana Search Box and hit Enter to bring it up and Select the appropriate result. You can also use it to delete even 7-day old temporary files and even free up additional disk space by removing all, but the most recent system restore point using the Disk Cleanup utility. TIP: USBDriveFresher is a Junk file and folder cleaner for USB Drives.
5] Look for Hidden Files
You can also try to use the Show Hidden Files option to check all the hidden files that are taking up space on your hard disk. These files can be deleted to free up some additional space. It includes some RAW data files from games and some utility software. Read: Hard drive full? How to find the largest files on Windows?
6] Miscellaneous Fixes
This fix brings up a broad spectrum of fixes that you can undertake to fix the issue that you are facing. First of all, you can try to uninstall the UWP or Win32 applications installed on your computer. You can uninstall applications that you no longer use or are buggy enough to cause this issue of eating up free space on your disk. Secondly, you can use third-party tools like CCleaner to clean up all the junk that is lying in almost all parts of your computer and free a lot of space too. Thirdly, you can clean up the Recycle Bin to further free up space by deleting some files that you are sure about you not needing them permanently.
