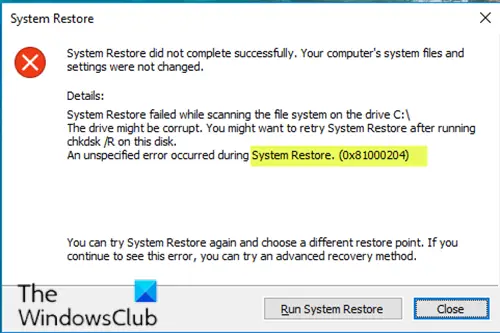
Fix System Restore error 0x81000204
If you’re faced with this issue, you can try our recommended solutions outlined below in no particular order and see if that helps to resolve the issue. Let’s take a look at the description of the process involved concerning each of the listed solutions.
1] Run CHKDSK
To run CHKDSK, do the following:
Press Windows key + R to invoke the Run dialog.In the Run dialog box, type cmd and then press CTRL + SHIFT + ENTER to open Command Prompt in admin/elevated mode.In the command prompt window, type the command below and hit Enter.
You will receive the following message:
Press the Y key on the keyboard and then reboot your computer to let CHKDSK to check and fix the errors on the computer hard drive.
After CHKDSK completes, check to see if the issue is resolved.
2] Run SFC scan
System File Checker is a utility in Microsoft Windows that allows users to scan for and restore corruption in Windows system files. This solution requires you to run SFC scan and afterward, try running System Restore again and see if it completes successfully without the error 0x81000204. If the issue is unresolved, continue with the next solution.
3] Perform DISM scan
Deployment Image Servicing and Management (DISM.exe) comes built into Windows 10 and is available through the command line or from Windows PowerShell – which can be used to service and prepare Windows images, including those used for Windows PE, Windows Recovery Environment (Windows RE) and Windows Setup. DISM can be used to service a Windows image (.wim) or a virtual hard disk (.vhd or .vhdx). This solution requires you to perform DISM scan and then retry the system restore operation. If the procedure fails with the same error, proceed with the next solution.
4] Use Windows Command Prompt
Open the Windows 10 Command Prompt and execute the following commands in the given order: Restart the system and try now.
5] Reset the Repository
To do so follows these steps: Again open a command prompt as administrator, type the following and hit Enter: Next, type the following and hit Enter: Restart and see if you can create a System Restore Point manually.
6] Run System Restore in Safe Mode or Clean Boot State
Boot into Safe Mode and see if you create a system restore point or restore to a prior restore point. Many times, non-Microsoft services or Drivers can interfere with the proper functioning of System Restore. Alternatively, you could also execute a Clean Boot and see if you are able to get system restore working.
7] Use a 3rd party Backup software
This solution simply entails you use any of the 3rd party Imaging, Backup and Recovery Software for Windows 10 capable of doing the same thing as the System Restore utility.
8] Perform Reset This PC, Cloud Reset or Repair Windows 11/10
If the issue is still unresolved, it’s most likely due to some kind of system corruption that cannot be resolved conventionally. In this case, the applicable solution here is that you can try Reset This PC, or Cloud Reset to reset every Windows component. You may also try to Repair Windows using Installation Media as a last resort. We hope something here helps you fix your System Restore problems.

