Customize & personalize your Outlook.com experience
Once you have signed in for the first time, you will be offered options to customize. You will see 6 steps or settings to be completed under the ‘Get started‘ heading. For your better understanding, I have highlighted those tabs in yellow.
The customizations options you will see are: Now let us take a look at them in detail.
1. Choose your look
Select a theme for your choice.Enable or disable the dark mode.Choose the layout preference – Three columns or a single line.Choose the display density – Full, medium or compact.
Once you have selected your option, click Done.
2. Confirm time zone
General:
Language and time – Select the appropriate language, date format and time format under the dropdown list.
Appearance – You can choose a theme of your liking for your account. You can also enable or disable the dark mode.
Notifications – Choose the In-app notifications and Desktop notifications accordingly.
Categories – Categorizing your email and calendar an help you organize and track messages and events related to a project, task, or person. You can create new categories and assign them names and colors.
Accessibility – You can choose which version of shortcuts you’d like to use, or turn them off. I have chosen ‘Outlook’ for myself. You can also check or uncheck the box under ‘Adjust timing’.
Mobile Devices – You can add a new device and set it up to synchronize with your account. You can also remove a mobile device, access your device recovery password, initiate a remote device wipe, or block your phone if you lose it.
Storage – This tab shows the storage details.
Privacy and data – You can export your mailbox to get a copy of it, delete or download your search history, and protect your data by loading external images through the Outlook service.
Mail:
Here, you will find settings related to layout, compose and reply, attachments, message handling and forwarding, automatic replies, and subscriptions, etc.
Do go through every option to set details regarding the message height, where you wish to have the reading pane, email signature, message format, storage accounts and sharing preferences, junk email, how you want to customize your most frequently used actions, and a lot more such settings.
Calendar:
It is possible to customize the calendar appearance, choose which temperature scale to use for displaying weather, share a calendar with other people, publish a calendar and share a link with other people, and customize actions as well.
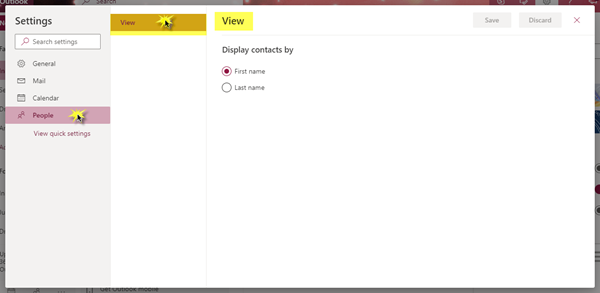
People:
You can decide the way you want to view your contacts. You can choose to display your contacts by first name or last name.
3. Import contacts
You can import contacts from other email apps using a CSV file. To know more about this setting, click below on ‘Learn more’.
4. Send a message
You can send an email message to your contacts in order to update them with your new email address.
5. Get Outlook mobile
You can download the Outlook app on your mobile device for free by simply entering your mobile number, choosing the country / region, and then at last clicking on Send Link.
6. Upgrade to Office 365
You can get premium Outlook features by upgrading to Office 365. Go through the different packages and the benefits they offer and then decide which one you would prefer to buy.
With Office 365, you will get various benefits where you can work offline, quickly find your most recent files when sending attachments, and easy, professional formatting. In addition, you can get the latest versions of Word, Excel, and PowerPoint, along with 1 TB of OneDrive loud storage. With these 6 steps, you are good to go! Your Microsoft Outlook account will be completely enhanced and set up perfectly. You can now start using it with all ease and convenience. Hope this post was useful to you and easy to understand. Do share and leave comments below.