Create custom toolbar to launch programs on Windows 10
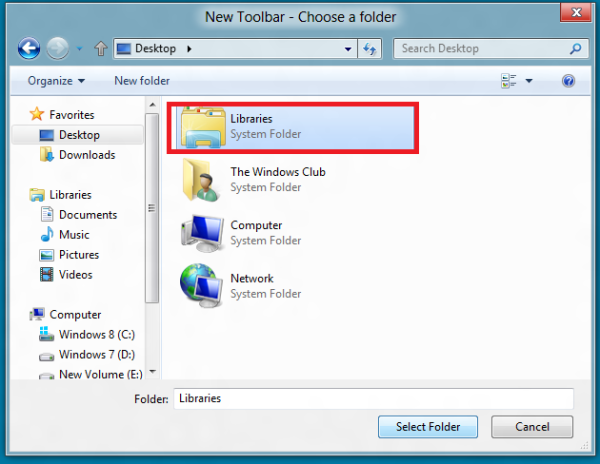
First, create a folder on your Windows 8 desktop, and give it any name. I have named it Launcher. Put all your shortcuts in this folder. You may include programs, files and folders too. Now right-click on the taskbar and choose the Toolbar > New toolbar option. Instantly, a dialog box will pop-up on your computer screen prompting you to choose a folder. Go to: The Programs menu will appear on the right side of the taskbar, next to the tray. Now if you want, you can alternatively add the Launcher folder which you have created instead. If you want the toolbar items to be clearly visible, unlock the taskbar and drag the dividing borderline to the left to increase its size. But you might not want to do it as it will reduce your free space on the taskbar. Right-click on the taskbar and choose ‘Lock the taskbar’ option to prevent it from being dragged around. Please note that the toolbar will only display programs that get installed into the current user’s Start Menu/Programs folder. Some applications install into the default user’s Programs folder at: But as I mentioned you will need to create a second toolbar, in our case Launcher folder, and use it if you want easy access to those shortcuts. You could also place the Launcher folder in the Start Menu/Programs folder. The choice exists.
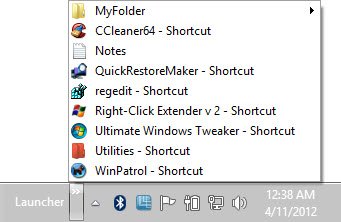
To close or remove the toolbar, right-click the taskbar > Toolbars > Uncheck Launcher. Enjoy Windows! Read: How to use Quick Launch Toolbar in Windows 11.