The crash dump files are of 4 main types. On Windows 11/10, they are either:
Configure Windows to create Crash Dump Files on Blue Screen
First of all, we would recommend you to make a System Restore point. Because we will be playing with system files and modifying some critical Windows settings. Now, we will continue on our quest of making Windows 10 create Dump Files after a Stop Error.
1: Create Dump files by modifying settings in Startup and Recovery
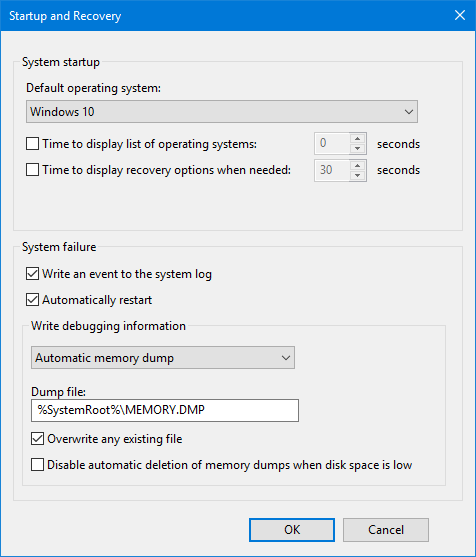
Now, first of all, start by opening the Control Panel. To do this, just search for Control Panel in the Cortana Search box and clicking on the appropriate results. Make sure that you are viewing the contents by their Category. Click on the header link labeled as System and Security – or, just right-click on the This PC icon and click on Properties. Now, on the left panel, select Advanced system settings. A new small window will open up. Inside that, under the region called Startup and Recovery, select the Settings button.
Under the region called as System Failure, you can select any option from the drop-down for Write debugging information:
None (No dump file created by Windows)Small Memory Dump (Windows will create a Minidump file on BSOD)Kernel Memory Dump (Windows will create a Kernel Memory Dump file on BSOD)Complete Memory Dump (Windows will create a Complete Memory Dump file on BSOD)Automatic Memory Dump (Windows will create Automatic Memory Dump file on BSODActive Memory Dump (Windows will create an Active Memory Dump file on BSOD)
It is worth noting that the complete dump needs a page file allowed to be a size of the physical memory installed on the computer with a dedicated 1MB space for just the page header. Now after selecting the most suitable option for you, select OK/Apply and exit. Reboot your computer for the changes to take effect.
2: Create Dump files WMIC command line
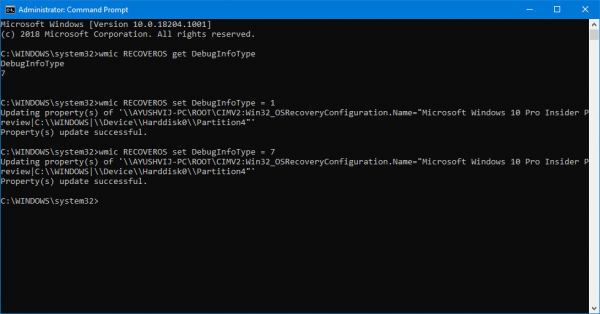
Start by pressing WINKEY + X button combo or right-click on the Start button and click on Command Prompt (Admin) or just search for cmd in the Cortana search box, right click on the Command Prompt icon and click on Run as Administrator.
Now, type in any one of the following commands as per your preferences in order to make Windows 10 create Dump Files. For your information, a complete dump needs a Page file allowed to be a size of the physical memory installed on the computer with a dedicated 1MB space for just the page header. Now, type in exit to exit the Command Prompt. Reboot your computer for the changes to take effect. Read: How to manually create a Crash Dump file in Windows 11/10. In case you wish to check what current Memory Dump Settings are on your computer, simply type in the following command to check, Now check if your modified settings work or not. TIP: You can use Crash Dump Analyzer software to analyze crash dump reports.