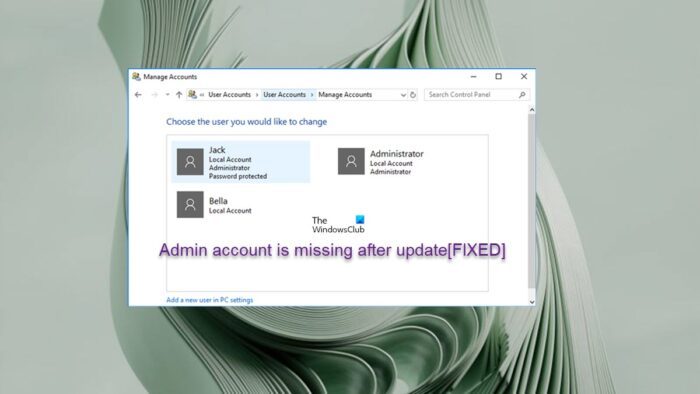
Admin account is missing after Windows Update
If after you update your Windows 11/10 PC to the latest version/build and the administrator account is missing, you can try our recommended solutions below in no particular order and see what helps you resolve this issue on your system. Let’s look at the description of the process as it relates to each of the listed solutions.
1] Restart PC
If the admin account is missing after installing a recent update on your Windows 11/10 PC, it could be an issue of being logged in with a Temporary Profile, especially when you notice files and folders disappear from the desktop and the desktop wallpaper or background is the default. A temporary profile can happen for many reasons, but the short of it is that Windows was not able to load your regular profile. Rather than lock you out of the PC entirely, it will log you in with a temporary one. Any changes made to the temporary profile are lost when you log out, similar to an Incognito/InPrivate browser window. 9 out of 10 times, rebooting your PC is enough to fix the issue as whatever interrupted the process the first time is not likely to happen again. If it did happen again, you would need to make a new user account on the PC and migrate your data to that. Read: Do not login users with Temporary Profiles on Windows
2] Change Standard account to Administrator account
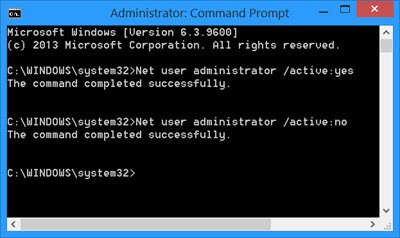
The issue in hand may also occur due to the admin user account has been disabled on your computer. However, a disabled account can be enabled, but it is different from deleting the account, which cannot be restored. This solution requires you to change the Standard account to an Administrator account, but since you require admin privilege to do so, you first need to enable the inbuilt administrator account and then carry out the change within that account. Remember to disable the inbuilt administrator once you complete the task. To enable this built-in Administrator account, do the following:
Press the Windows key + R to invoke the Run dialog. In the Run dialog box, type cmd and then press CTRL + SHIFT + ENTER to open Command Prompt in admin/elevated mode. In the command prompt window, copy and paste the command below and hit Enter:
Exit CMD prompt once the command executes.
Now, to change the Standard account to the Administrator account, do the following:
Sign out from the current standard user account. Sign in to the inbuilt admin account.
Windows 11
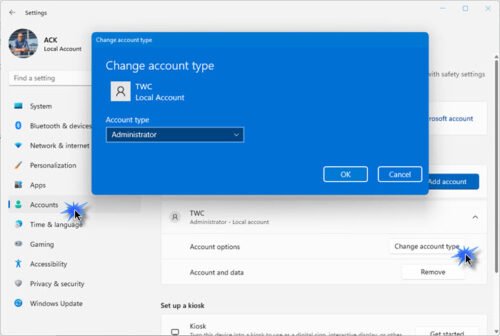
Press Windows key + I to open Settings. Click Accounts on the left navigation pane. On the right side, select Family and other users. Now locate the user account and click on it. Click on the Change account type button that appears. In the popup, change the Account type accordingly. Click OK. Exit the Settings app.
Windows 10
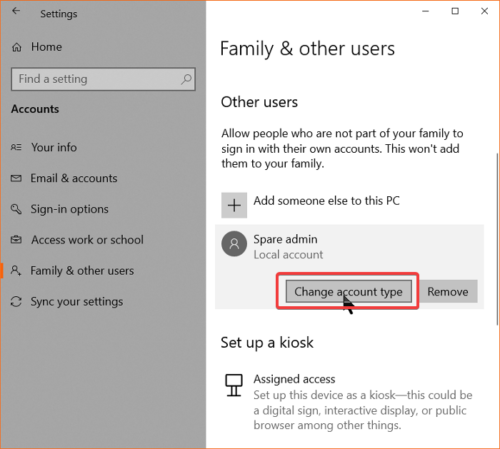
Press Windows key + I to open Settings. Select Accounts from the menu. Next, select Family & other users. Now, under Your family or other users’ menu, find the user account you want to modify and click on it. Click on the Change account type button. On the next screen, select the preferred user account type from the dropdown. Click the OK button. Exit the Settings app.
Read: Fix Administrator Account has been disabled on Windows
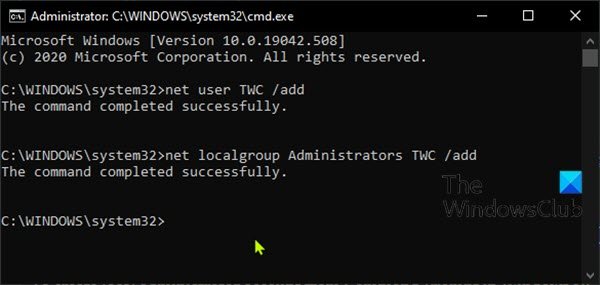
3] Create a new Administrator Account
This solution requires you to create a new administrator account on your Windows 11/10 device. To perform this task, follow these steps:
Open Command Prompt in elevated mode. In the command prompt window, type the command below and hit Enter. Substitute the UserName placeholder in the command with the actual name of your new local account.
Next, still in the command prompt, run the command below to add the new account to the Administrator group.
Exit CMD prompt when done.
Read: How to create a Guest Account in Windows
4] Uninstall update or perform System Restore
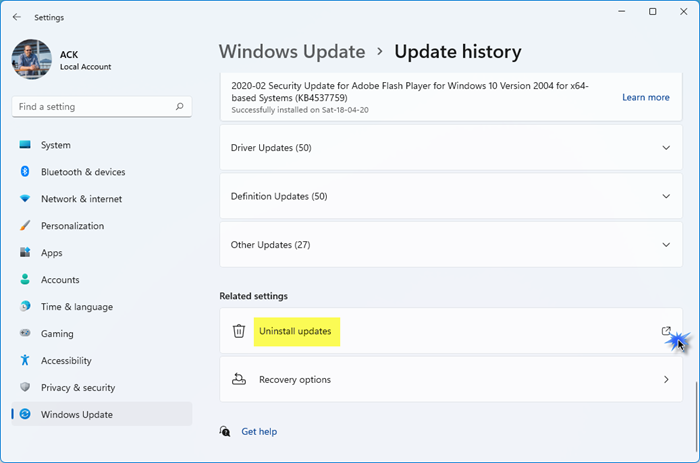
Since the issue you are currently facing started after installing a new Windows update, a viable solution here is to either uninstall the update or perform System Restore. To uninstall the recent update on your device, follow these steps: Windows 11
Open the Settings app. Click on Windows Update on the left navigation pane. Click on Update History. On the next screen, scroll down to the Related settings section. Click on the button on the right side of Uninstall updates to open the Installed Updates Control Panel applet. Now, right-click on the Update. Select Uninstall from the context menu.
Windows 10
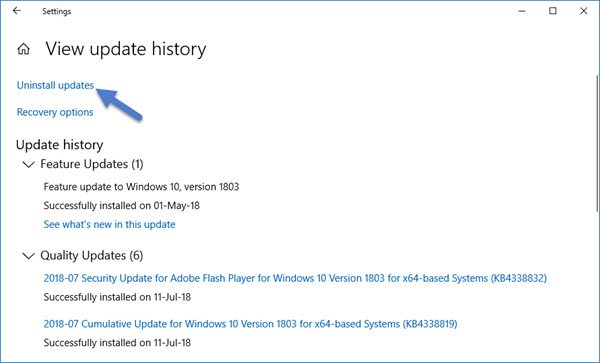
Open the Settings app. Go to Update and Security > Windows Update > View update history. Click on the Uninstall Updates link to open a window that will show the list of all the installed updates on your computer. Now, select the update you want to uninstall. Click on the Uninstall button in the lower right corner of the window.
Read: Uninstall Windows Updates marked as Permanent without Uninstall option As an alternative to uninstalling the Windows update, you can perform System Restore by following these steps:
Press Windows key + R. to invoke the Run dialog. In the Run dialog box, type rstrui and hit Enter to launch the System Restore Wizard. At the initial screen of System Restore, click Next. At the next screen, check the box associated with Show more restore points. Now, select a restore point before when you noticed the issue on your device. Click Next to advance to the next menu. Click Finish and confirm at the final prompt.
Read: How to perform System Restore when Windows won’t boot to desktop
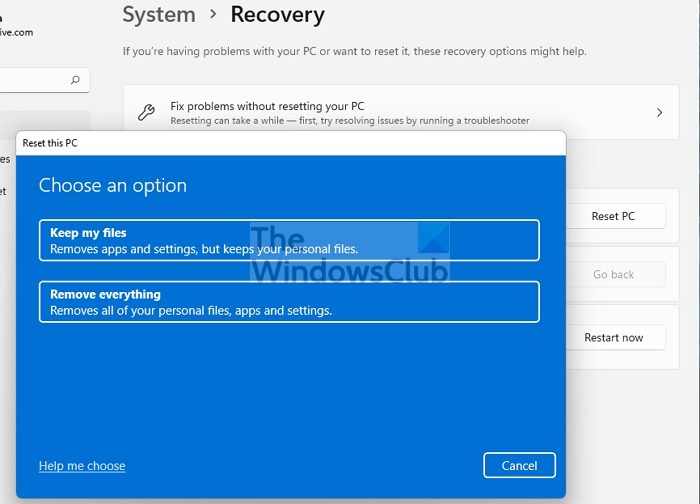
5] Reset Windows 11/10
This is another viable solution if perchance you’re dealing with severe system corruption which could be caused by the botched Windows update installed on your device. So here, you can first try Reset This PC, or Cloud Reinstall to reset every Windows component. You may also try In-place Upgrade Repair and if nothing helps, you will have to clean install Windows 11/10 on your device. Read: Reset Windows 11 using Advanced Startup Options when PC won’t boot I hope you find this post helpful.
Related posts:
User Accounts missing after upgrading to Windows 11/10 Data and Files missing after an upgrade to Windows 11/10
How do I recover my administrator account on Windows 11?
Open the Run dialog box, copy and paste in netplwiz, and hit Enter on the keyboard. Highlight your account, then click Properties, then Group Membership tab. Click on Administrator, then Apply > OK. Restart PC.
What happens if I delete the Administrator account?
When you delete an admin account, all data saved in that account will be deleted. For instance, you will lose your documents, pictures, music, and other items on the desktop of the account. However, it’s strongly recommended NOT to delete the inbuilt Administrator account although the built-in administrator account in Windows 11/10 can be a security risk, especially if the person has physical access to your computer. It’s better to have this account disabled. Read: How to delete the built-in Administrator Account in Windows
Why is the built-in administrator account disabled?
The built-in administrator account has a specific and well-known security identifier, and some attacks target that particular SID. Renaming the account doesn’t help, because the SID will stay the same. Therefore as a Windows security measure, by default, the inbuilt administrator account is disabled.